Quantcast
Channel: Zmodo Knowledge Base - Latest FAQs
Viewing all 208 articles
Browse latest View live

What Kind of Hard Drive Will Work in a Zmodo DVR?

$
0
0
What Kind of Hard Drive Will Work in a Zmodo DVR?
 
In a Zmodo DVR, you can use almost any hard drive that uses the SATA interface.  You will want to follow the basic requirements when choosing which hard drive though.
 
Requirements: 
    1. SATA II or SATA III interface
    2. Storage capacity of at least 250GB and no more than 2TB.  See our Storage Calculator to determine exactly how much you need. 
    3. Choose a hard drive with a physical size of 3.5".  It may also be reffered to as a desktop sized hard drive.
 
There aren't too many actual requirements for a hard drive to work, however for the absolute best results, please follow our additional recommendations. 
 
Recommendations:
  1. Choose a hard drive that spins at 5400RPMS because these hard drives use less power and also produce less heat.
  2. Choose a hard drive that is rated as industrial/surveillance grade because a standard, PC grade hard drive will fail quickly in a DVR system.
  3. Use a hard drive with 16MB of cache or more.
  4. There are two hard drives that meet all of the requirements and recommendations and they are the Western Digital AV-GP line of hard drives and the Seagate Pipeline line of hard drives.
 
Warnings: 
    1. Stay away from using Western Digital Caviar Black hard drives.  They have higher power requirements and create much more heat. 
    2. Do not use a Solid State drive (SSD) in the DVR.  The constant writing of the drive will wear the drive out much faster than a traditional hard drive. 
    3. Do not use an external hard drive that hooks up through USB.  The USB interface does not allow live recording. 
 

SBN/SAN Series DVR Has Stopped Showing Video On My Monitor

$
0
0

If your DVR has stopped showing video on your monitor, the first step in the troubleshooting is to check cables and make sure they are connected properly.  

Your monitor should be plugged into the VGA port on the back.  Many TV's do not support the resolution of the DVR over VGA so it is recommended to use a computer monitor instead.  


If the cable is plugged in properly, then you must try to reset the resolution to defaults.


  1. To reset this particular DVR's output resolution, you will need to have the remote control and then power the DVR on.
  2. Wait 2 minutes to ensure the DVR is completely booted.
  3. Press "Esc, 2, Esc" on the remote control.  
  4. DVR should Reset the resolution to defaults.


If this does not solve the issue, we recommend trying a known-good VGA cable and a known-good monitor.  If that still doesn't solve the problem, the video output is most likely defective and the DVR will need to be repalced.  

SCN4/SCN8 No Video CH1 - BNC Connections Explained

$
0
0

On the back of the ZMD-DT-SCN4 and the ZMD-DT-SCN8, the labels are confusing.

Please use the following picture to help you plug cameras into the right ports.  

  • The BNC connections in the GREEN square are for your cameras.  
  • The BNC connection in RED is a BNC video output to run to a display.  
  • For the 8 channel, the BNC video output will be located directly above the Audio Output port.

CM-I11123BK / CM-I12316GY - Wifi Setup Guide

$
0
0

The CM-I11123BK and the CM-I12316GY share the same software and the same setup instructions. Before starting the setup, please make sure that your camera powered on and plugged into your router with the included ethernet cable.

  1. Install the search tool from the included software disc.  If you do not have the software disc, you can download it from:  HERE

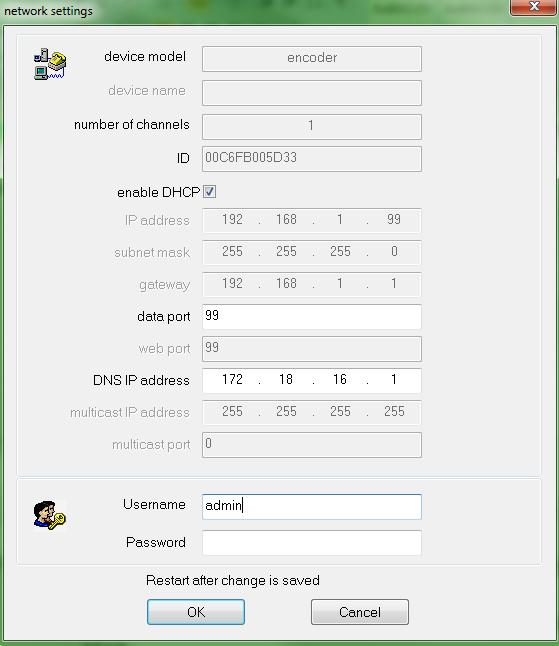
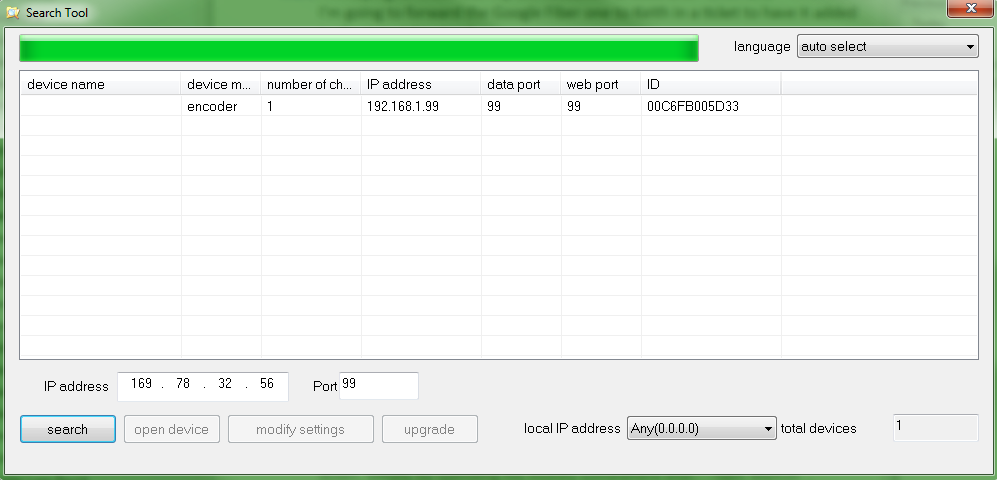
  2. Open the search tool and click "Search".  It should find the camera at it's default IP of 192.168.1.99


  3. Highlight the camera in the search tool and click "Modify Settings".  

  4. Put a check next to "Enable DHCP", type "admin" into the box next to username, and then click "OK".


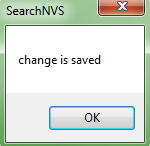
  5. After clicking OK, the camera will tell you "change is saved".


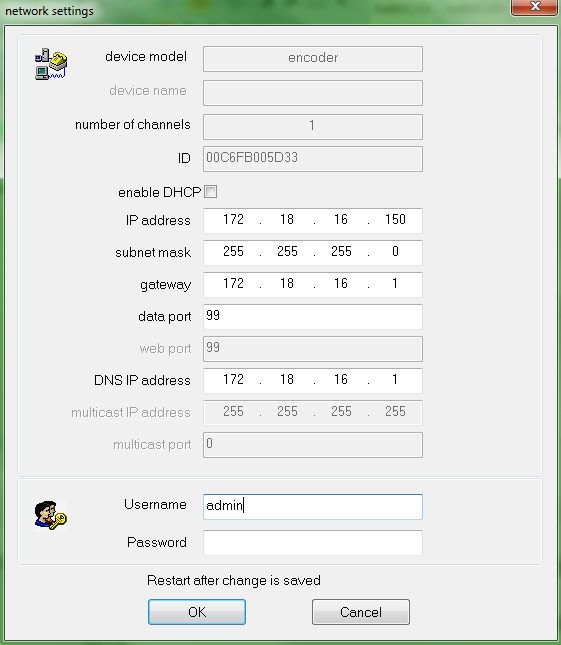
  6. Wait for 1 minute then hit "Search". Highlight the camera, and click "Modify Settings" again.  

  7. Uncheck "Enable DHCP" and find the IP Address.  Add 50 to the last number in the set.  For example, if your IP says 192.168.1.23, change it to 192.168.1.73.  Type the username "admin" in and click "OK".


  8. Wait for approximately 1 minute, and click "Search" again.

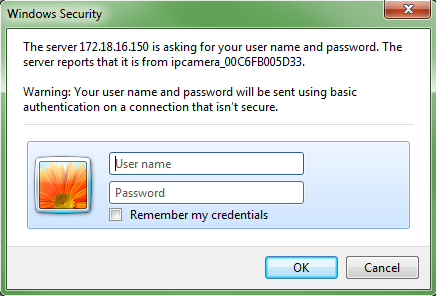
  9. Highlight the camera in the search tool and choose "Open Device".  This will open the camera in Internet Explorer.  

  10. Type in the username "admin" and click "OK" to login.  There is no password by default.


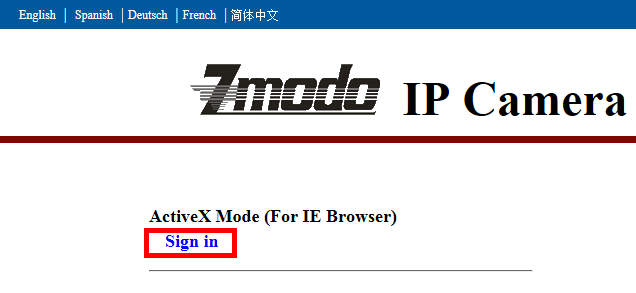
  11. Click "Sign in" under "ActiveX Mode (For IE Browser)"


  12. Internet Explorer will now install the add-on.  Accept or allow any prompts to install software at this point.  If it doesn't work, you may need to configure your ActiveX controls as explained:  HERE

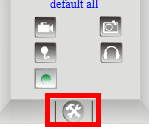
  13. Click the "Settins" icon in the bottom right of the page.


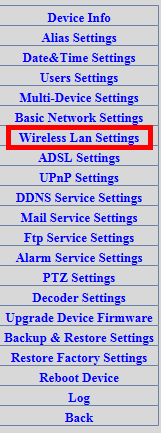
  14. In the column on the right hand side, choose "Wireless Lan Settings"


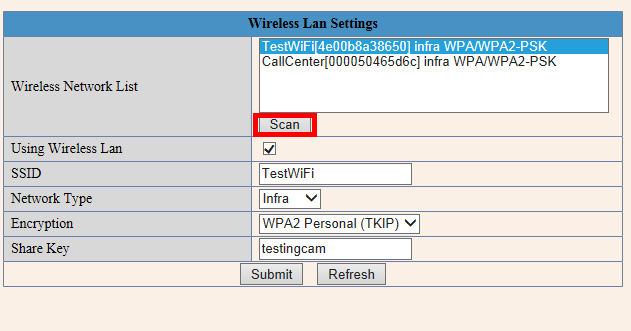
  15. Click the "Scan" button 2-3 times.  Your wireless network should show up in the list.  


  16. Type your WiFi password in the "Share Key" field and then click submit.  The screen will change and start a 30 second countdown.  Remove the ethernet cable with 20-25 seconds left.


  17. After the countdown is complete, wait another 10-15 seconds and hit Search in the tool again.  If the camera is detected, your camera is now on wireless and you can put the camera where you would like.  

  18. To set up recording, we recommend using the software ISPY and it can be located:  HERE

CM-I11123BK / CM-I12316GY - Recording With iSPY

$
0
0

One of the best pieces of software to record the video footage from the CM-I11123BK and CM-I1231GY is iSPY.  It is opensource software that is available for download at www.ispyconnect.com

ONLY the CM-I11123BK and the CM-I12316GY will work with iSPY.  Zmodo does not officially support the recording or setup of iSPY other than this article.


  1. Your camera should already be connected to the network and setup on WiFi.  If you haven't done this already, please follow this guide:  HERE

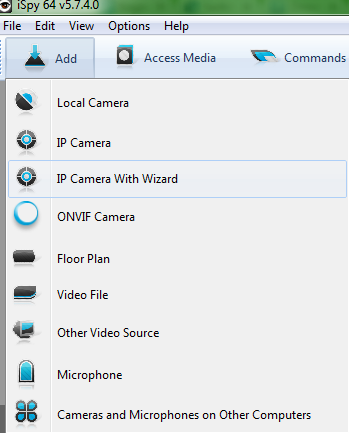
  2. Open iSPY and Click "Add" and choose "IP Camera with Wizard"


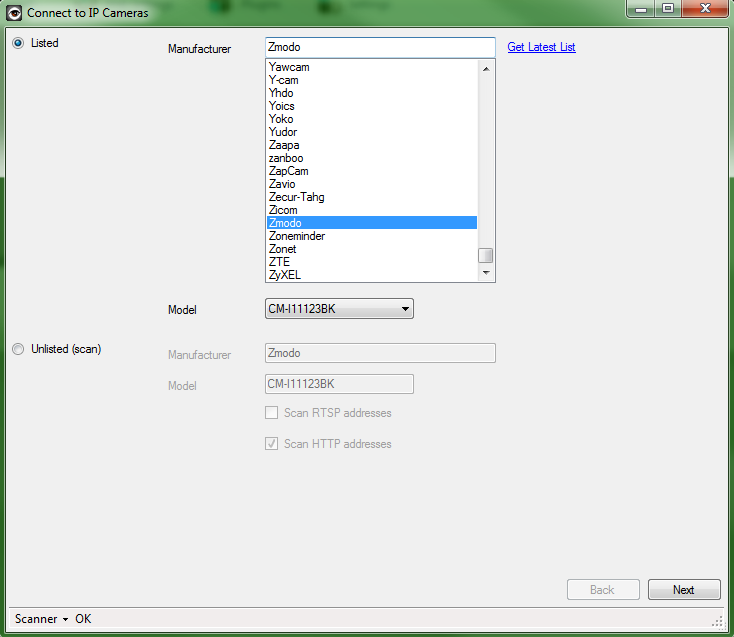
  3. Select "Zmodo" from the Manufacturer list, select the Model of "CM-I11123BK", and click "Next"


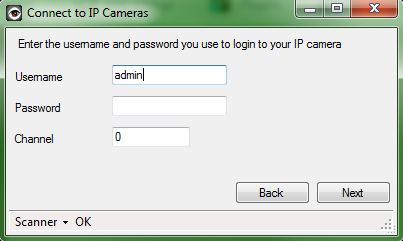
  4. Type in the username and password for your IP Camera.  Leave the Channel at 0.


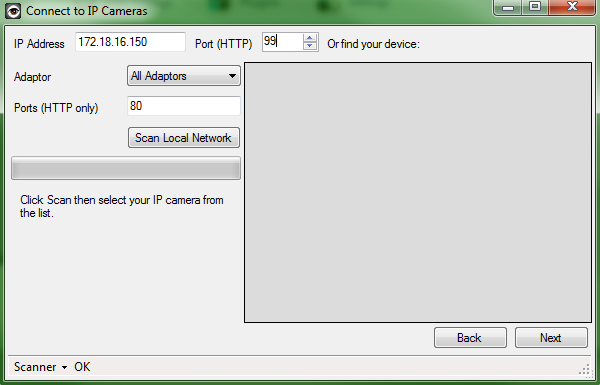
  5. Type in the IP Address and port number for your camera.  Default HTTP port for the camera is 99.  


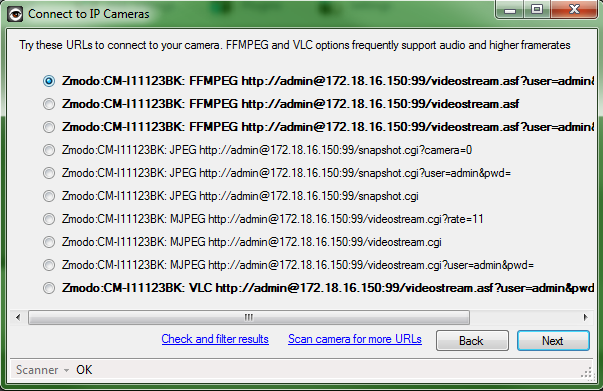
  6. Allow iSPY to check which of the URLS are valid.  The top URL should be the best one to use.  Click "Next" after it has been selected.  


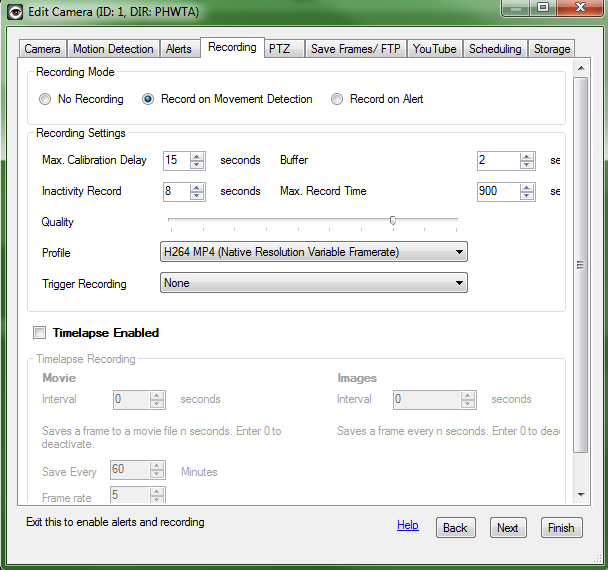
  7. Now the camera should be connected and configured to record on motion by default.  If you wish to change any more advanced settings, you can do this now.  If recording on motion is fine for you, just hit finish.  


  8. iSPY must be running in order for recordings to be saved.  If it is not running, your camera will not record.

CM-I11123BK / CM-I12316GY - Reset to Defaults

$
0
0

The steps to restore the CM-I11123BK are slightly different than the CM-I12316GY.


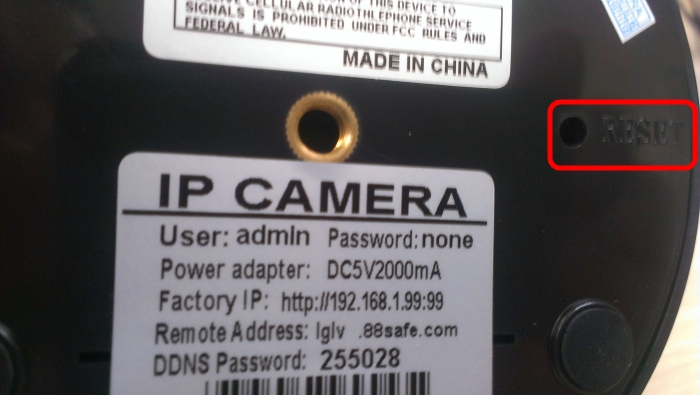
For the CM-I11123BK, flip the camera upside down and locate the "RESET" button on the bottom of the base.  Press and hold the button for 15 seconds.  


For the CM-I12316GY, there are 2 variations.  The first variation has 4 cables on the lead.  One for power, one for ethernet, and two other wires.  To reset this version, hold the two other wires together for 15 seconds.

For the other variation of the CM-I12316GY, there are three cables on the lead.  One for power, one for ethernet, and another cable with a button.  To reset this version, just hold the button on the cable for 15 seconds.  


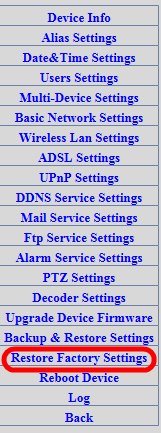
If your cameras are still accessible via Internet Explorer, you can reset them from the settings menu by selecting Restore Factory Settings as shown below:


How to Add Onvif IP Cameras to a ZMD-DH-SEN6

$
0
0

1.Upload the SEN6 firmware titled "3531.bin” that is located at:  http://files.zmodo.com/Firmwares/DVRs/ZMD-DH-SEN6/3531.bin

a.The SEN6 will take several minutes to upload the firmware, give it a good 5-10 minutes to finish.


2.Connect the IP Camera to the same router as the SEN6.

a.The gateway of the Mini-IP Camera has to match the gateway of both the router and the SEN6.

b.The camera can either be connected wired or wirelessly. The SEN6 will still detect the camera if the camera is connected wirelessly to the router.


3.Enable IP Cameras on the SEN6.

a.From the SEN6 Menu, go to the "Switch” tab.

b.Select the option for 8 Analog D1 Cameras and 8 Network 720P Cameras.

c.Wait for the SEN6 to reboot.


4.Add the IP Camera.

a.Go to the Switch tab and select the "Digital Channels” option.

b.In the drop-down box, select the channel that you want your IP Camera to appear on.

c.Check the "Enable” checkbox.

d.Click "Add” to enter the Search Menu.

i.From the Search Menu, set the Protocol to ONVIF in both protocol drop-down boxes.

ii.Click "Search”

iii.Double-Click on the IP address of the IP Camera that you want to stream onto this channel.

iv.Input the correct username and password for this IP Camera.

v.Click "OK” to return to the Select Channel Menu.

e.Check the check-box that represents your IP Camera.

f.Click "OK” and exit this menu. Your IP Camera should now stream video in the channel that you selected.

Adding Onvif IP Cameras to a ZMD-DH-SEN6

$
0
0

1.Upload the SEN6 firmware titled "3531.bin” that is attached to this article.  Download Firmware: HERE

a.The SEN6 will take several minutes to upload the firmware, give it a good 5-10 minutes to finish.


2.Connect the IP Camera to the same router as the SEN6.

a.The gateway of the Mini-IP Camera has to match the gateway of both the router and the SEN6.

b.The camera can either be connected wired or wirelessly. The SEN6 will still detect the camera if the camera is connected wirelessly to the router.


3.Enable IP Cameras on the SEN6.

a.From the SEN6 Menu, go to the "Switch” tab.

b.Select the option for 8 Analog D1 Cameras and 8 Network 720P Cameras.

c.Wait for the SEN6 to reboot.


4.Add the IP Camera.

a.Go to the Switch tab and select the "Digital Channels” option.

b.In the drop-down box, select the channel that you want your IP Camera to appear on.

c.Check the "Enable” checkbox.

d.Click "Add” to enter the Search Menu.

i.From the Search Menu, set the Protocol to ONVIF in both protocol drop-down boxes.

ii.Click "Search”

iii.Double-Click on the IP address of the IP Camera that you want to stream onto this channel.

iv.Input the correct username and password for this IP Camera.

v.Click "OK” to return to the Select Channel Menu.

e.Check the check-box that represents your IP Camera.

f.Click "OK” and exit this menu. Your IP Camera should now stream video in the channel that you selected.


Wireless IP Camera WiFi Frequency Information

$
0
0

All Zmodo brand Wireless IP Cameras operate on 2.4GHz 802.11 standards.  The following channels operate at the listed frequencies:


2412MHz (Channel 1)
2417MHz (Channel 2)
2422MHz (Channel 3)
2427MHz (Channel 4)
2432MHz (Channel 5)
2437MHz (Channel 6)
2442MHz (Channel 7)
2447MHz (Channel 8)
2452MHz (Channel 9)
2457MHz (Channel 10)
2462MHz (Channel 11)
2467MHz (Channel 12)
2472MHz (Channel 13) 

Enabling Motion Detection on the NVR (New Interface)

$
0
0


The following are all motion detection enabling steps once you've updated all new firmware onto the IP Cameras and NVR.  Any camera with FW versions of 1.0.1X-D should be compatible.  If your firmware contains 1.2.XX or 1.1.XX, please contact Zmodo directly for assistance:


1. Log into the IP Camera using Internet Explorer (Step 1 will need to be performed on all IP Cameras)

a. Go to Remote Configuration > Alarm Setting

b. From the Alarm Setting page, check the check-box labeled Motion Detect

c. Adjust the start and end time to read "00:00:00 – 23:59:00”

d. Left-click any squares in the grid that you do want to detect motion. Any non-orange squares in the grid will ignore motion. In this new firmware, you can click-and-drag over the squares to quickly select squares.

e. In the "Alarm Method" box, check Upload.

f. Click Submit to save these changes.


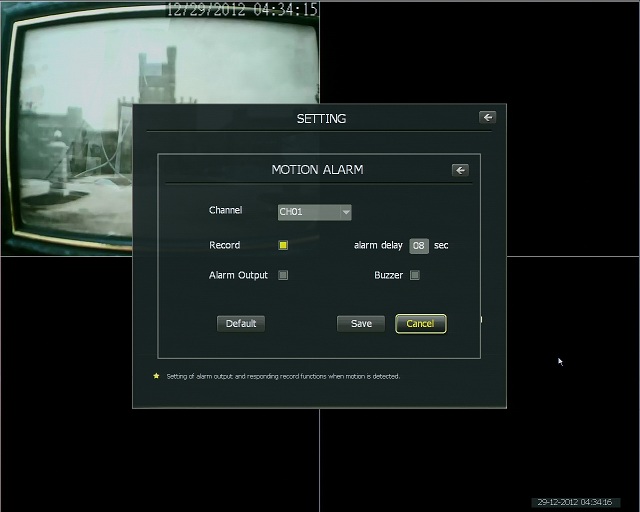
2. From the NVR, go to Main Menu > Setting > Motion Alarm


a. Check the check-box to enable Record for all channels in this menu.

b. Set the alarm delay to a number between 1 - 9 seconds.

c. Click "Save” to save these changes.


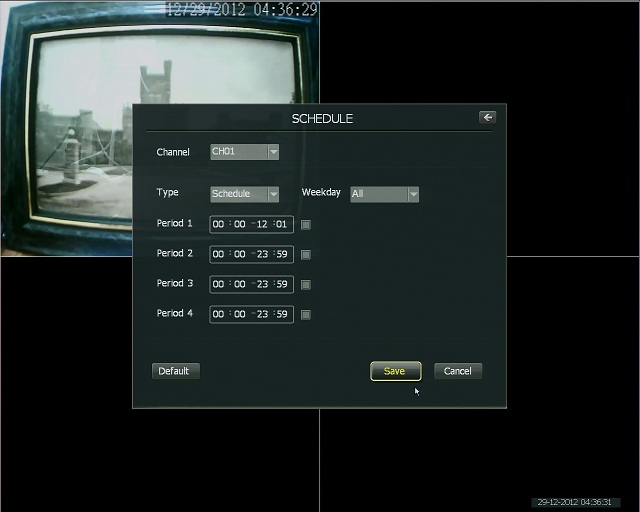
3. From the NVR, go to Main Menu > Setting > Schedule


From the Schedule page, change the following settings:

a. Change Channel: CH01 to ALL

b. Change Weekday: Sun to ALL

c. From the Schedule Tab (accessed by selecting "Schedule” in the drop-down box) disable Period1. This will disable scheduled recording.

d. Click Save.

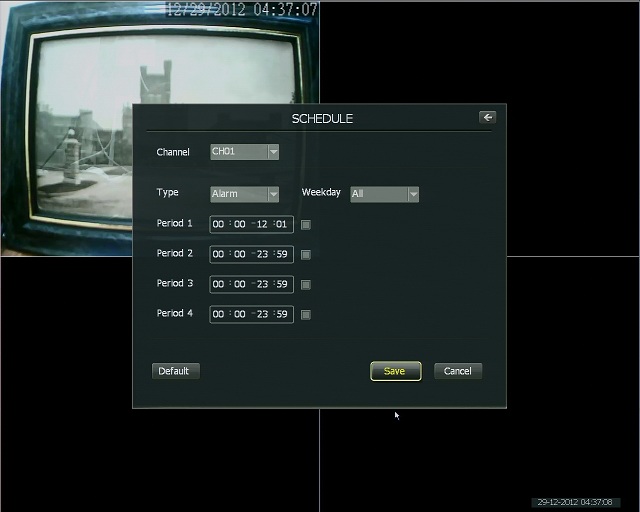
e. From the Alarm Tab (accessed by selecting "Alarm” in the drop-down box) make sure Period1 is disabled. This will ensure that Alarm-based recording is disabled.

f. Click Save.


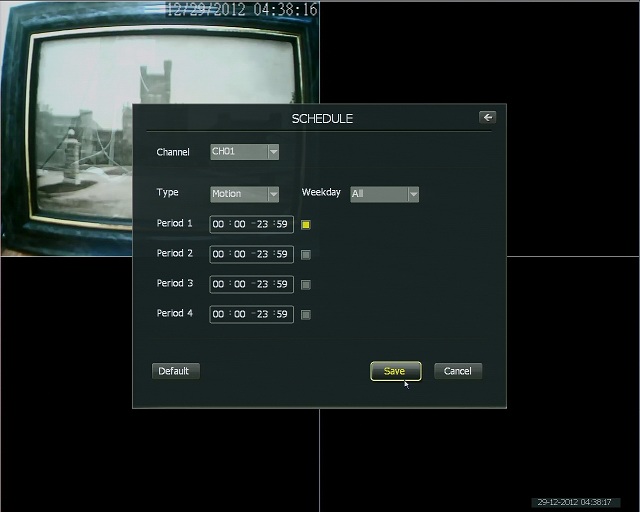
g. From the Motion Tab (accessed by selecting "Motion” in the drop-down box) set the time range to 00:00 – 23:59 in the Period1 field. Enable Period1 by selecting its check-box. This will enable motion recording.

h. Click Save.

4. After saving those changes, exit out to the camera grid. When one of the cameras detects motion, the NVR will display a red M on the screen as it records for the duration of time that motion takes place.
 
 
**When you go into the playback menu, you will see that any video that was recorded based on motion detection will be in yellow.

Cmos vs. CCD Cameras

$
0
0


Cmos vs. CCD Cameras

Background:

Cmos (Complementary Metal Oxide Semiconductor) and CCD (Charge Coupled Device) are ways to capture digital video signal. Both convert light into an electric charge and process it into electronic signals producing a digital picture. Dr. Savvas Chamberlain created both CMOS and CCD camera sensors.

Each option has it's advantages and disadvantages.


Usage:

  • Cmos: Industrial Environments
  • CCD: Photography cameras and higher resolution video cameras

Electrical Interference:

  • Cmos: Medium amount of interference
  • CCD: Little amount of interference


Night Vision Capabilities:

  • Cmos: Usually paired with fewer IR bulbs, and so it tends to produce a lower quality nightime image
  • CCD: Usually paired with more IR bulbs, so it produces a better picture in a low light


Overall Image Quality:

  • Cmos: Lower image quality compared to CCD
  • CCD: Cleaner image, but it sometimes has halos around bright lights


Price:

  • Cmos: Less expensive because it has fewer components, requires less power, and is cheaper to produce.
  • CCD: More expensive because it draws more power.


Simplified PoC NVR - How to Backup Video

$
0
0

Backing up video on the PoC NVR is extremely easy.  

To begin, plugin your USB Flash Drive and just move your mouse to the bottom of the screen. Locate and click on the "Playback" button showcased below.

Once in the playback menu, select your CH.  In the image below, CH 01 is selected

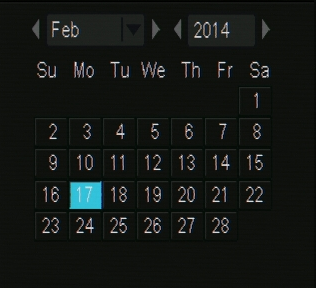
Then select the date of the video.  In the image below, February 17th is selected.


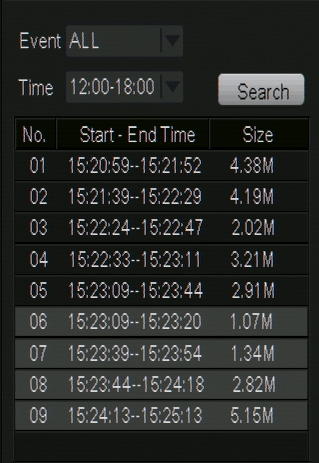
Then select the 6 hour block that the video is in and click "Search".  Left-click on any video files you wish to backup.  In the image below, 12:00-18:00 is selected and the bottom 4 video files are selected for backup.  


Once the video files are selected, click backup.  This will start the backup process.  Wait until you see Performing backup shows 100% and stays there as shown below.


Your backup is complete.  You can exit the menus and remove your USB flash drive.  These files are already in the .MP4 format for easy playback on multiple devices.  

Simplified PoC NVR - Notification Icon Explained

$
0
0

The new simplified PoC NVR has a notification icon in the menu bar when motion is detected.  The notification icon looks like this:


Clicking on the notification icon will take you to the video playback page and start playing the latest video recorded that includes movement.  


Simplified PoC NVR - Video Mask

$
0
0

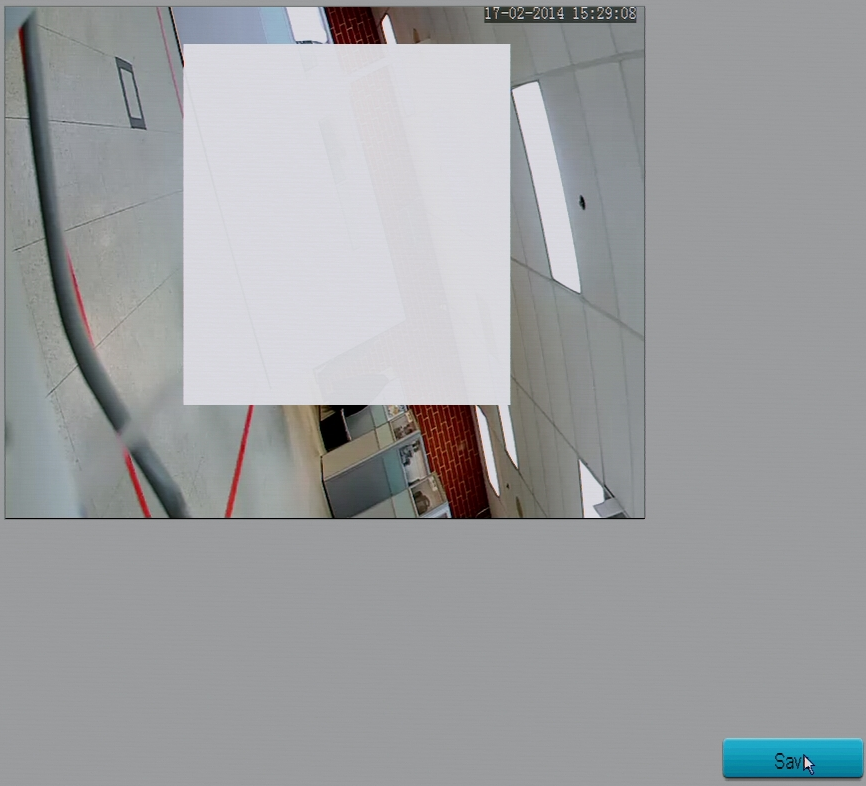
The simplified PoC NVR includes a feature to mask (or hide) certain parts of the video that are being recorded.  

To enable this, go to the main menu by moving your mouse to the bottom of the screen and selecting the menu icon as shown below:


Then select Device Management.


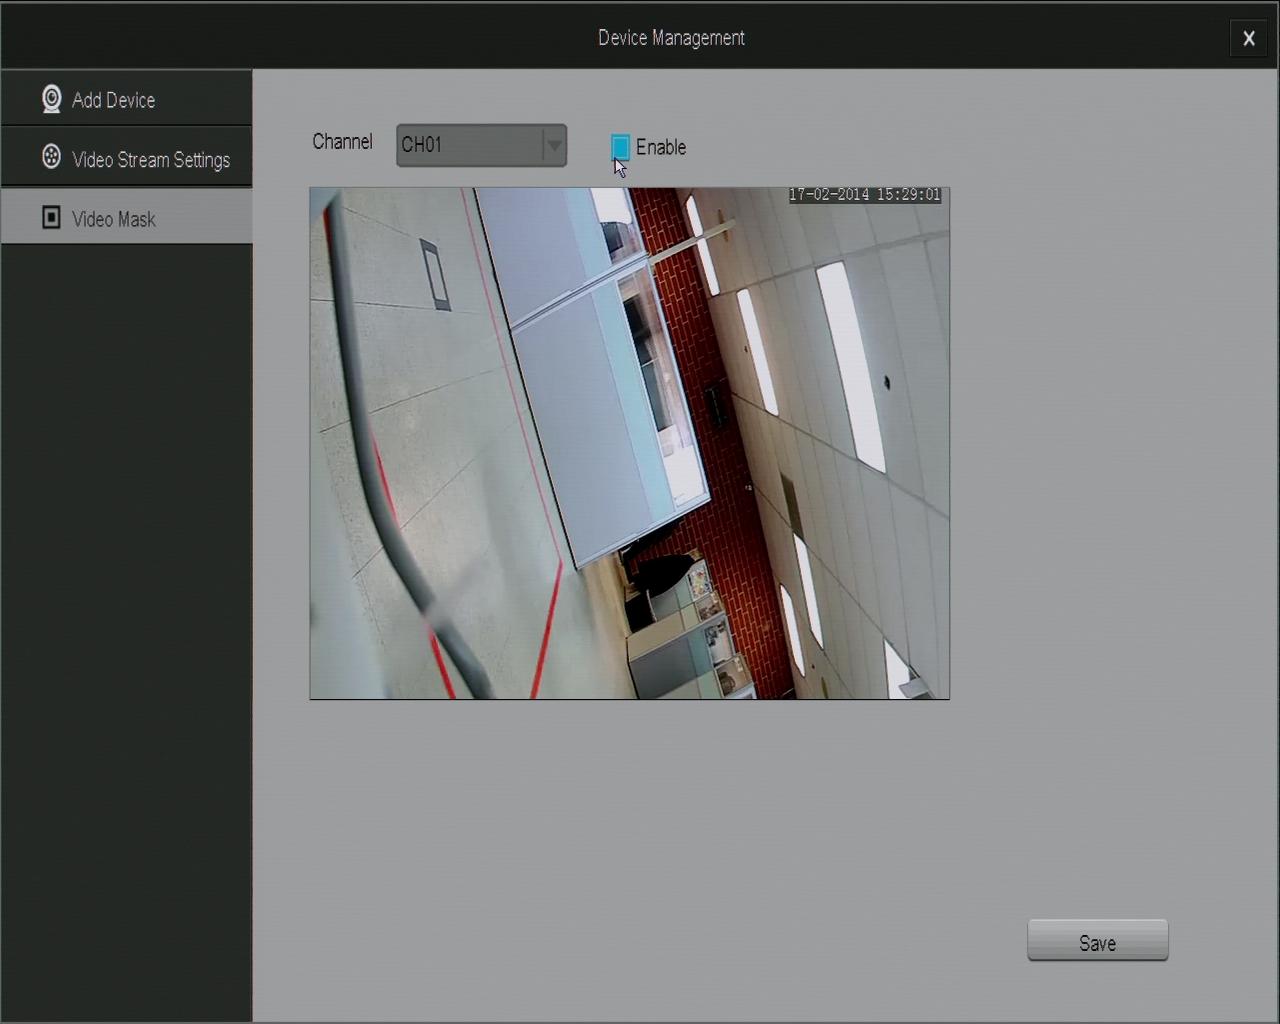
Select Video Mask from the list on the left, and you will see the screen shown below:


To enable a video mask, select the channel you want to enable it on, and then click on the box next to the word "Enable."


In the box showing the video, click and drag the mouse to cover the area you wish to mask and then click "Save" in the bottom right of the page.


After saving, if you exit out of all the menus on the NVR and can see your (4) cameras, you will notice that the area you marked off is now white.  


To remove the video mask, simply go back into the Video Mask menu, unselect enable, and then click save.  

Note:  The white area will stay there until you click the save button after disabling Video Mask.  


Simplified PoC NVR - How to Playback Video

$
0
0

It is simple to playback video from your PoC NVR.

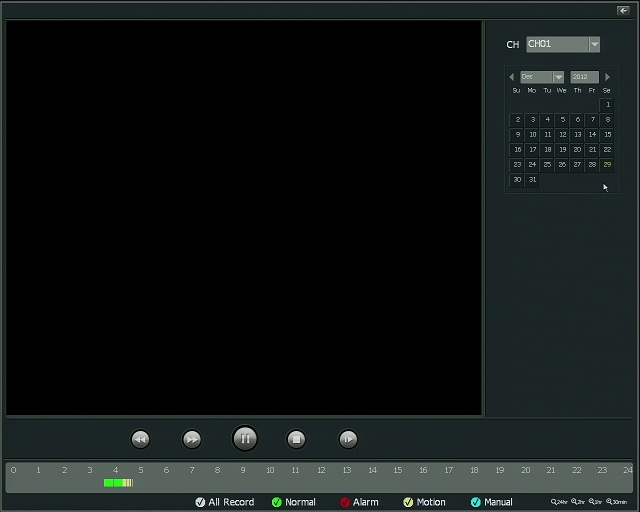
1. Move your mouse to the bottom of the screen until the bar shows up and then select the playback icon pictured below.

2. Select a channel in the top right.  In the picture below, CH 01 is selected.
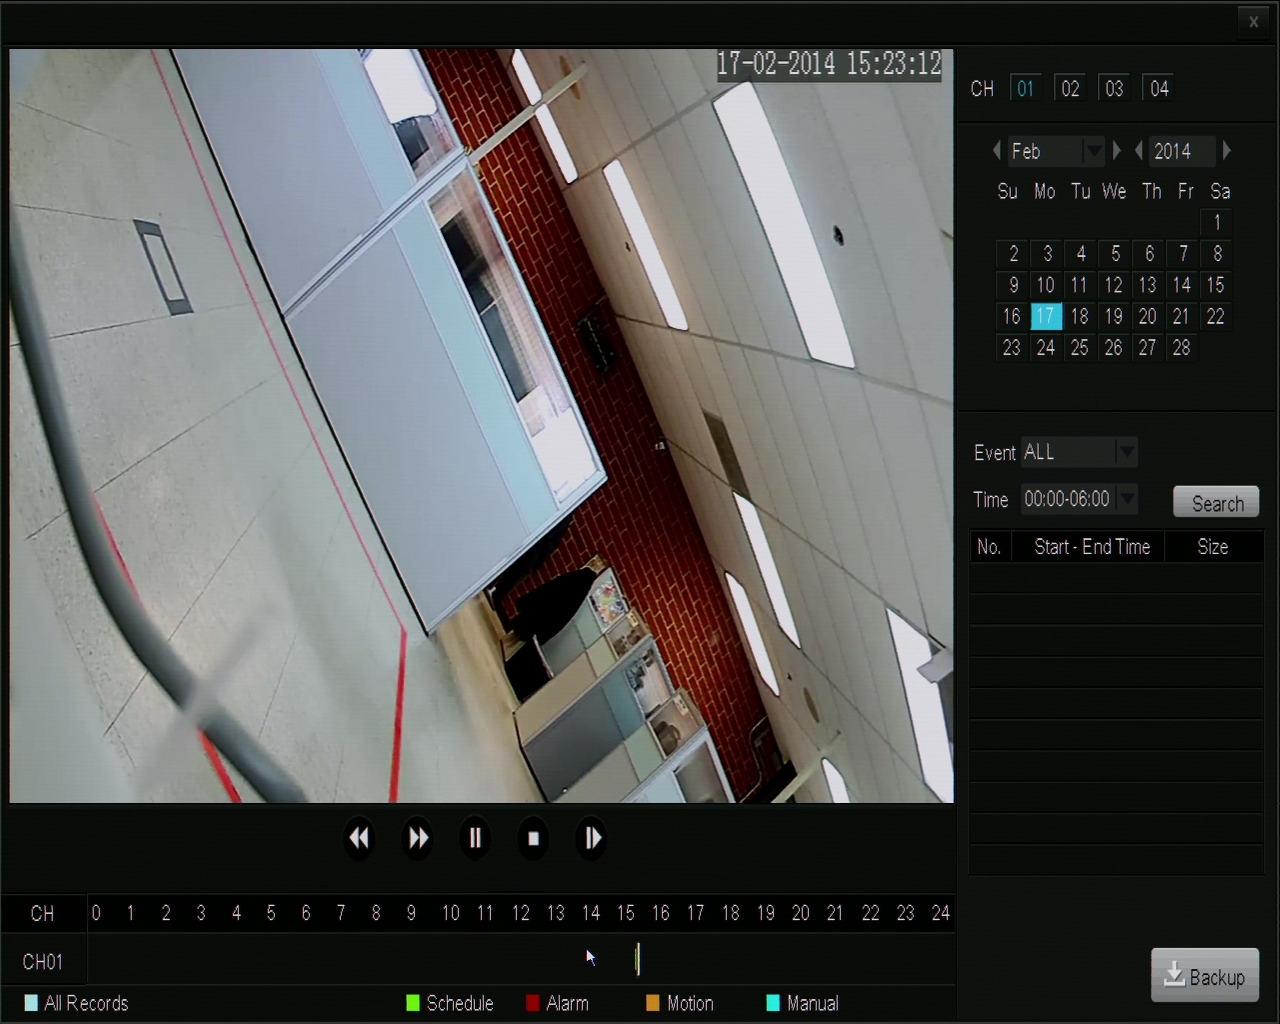
3. Select the date you want to playback video from.  In the picture below, February 17th is selected.
 

4. Using the video playback controls, select play to start from the beginning of the recordings for the day.  In the image below, the first recorded video is after 15:00 hours.


5. If you wish to playback a specific time, just click on the timeline any where you see color.  You can even use the scroll wheel on the mouse to zoom in on a more specific time.  In the image below, we have zoomed in on the 15:00 hours timeframe and can pick a more specific time.


If you wish to backup video.  You will need to view the backup article located here:  Backup Article


Simplified PoC NVR - Email Notifications for Motion Detection

$
0
0

To setup motion detection emails on the PoC NVR, move the mouse to the bottom of the screen and click on the Main Menu icon.


Then click on Event Management


Then click on "Motion Detection from the list on the left


Then click the box next to "Enable" and click on the "Config" button


Then choose the email service provider from the "Service Provider" list.  We recommend using Gmail.


Use the following information in the boxes:

From = The email address you will be using to send the emails.

Password = The password required for the sending email address

Email Subject = The title you want the email to have

Recipients = The email address you want to receive the email.


Click on "Test" to test your settings.  If it works, then save the settings.  You are done.

Note:  You must have an active internet connection on the NVR for the emails to work

Simplified PoC NVR - How to Format Hard Drive

$
0
0

Formatting the hard drive on the PoC NVR only takes a few steps.


 1. Start by moving your mouse to the bottom of the screen and clicking on the Settings icon in the bottom left of the screen as shown below.


2. From the Main Menu, select General Settings icon as shown below.


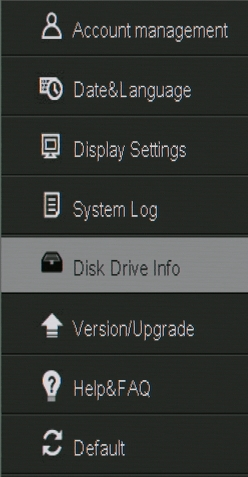
3. Select Disk Drive Info from the list on the left hand side.  The entire list is shown below with the Disk Drive Info selected.


4. The NVR will list the hard drive that it detects in the main section of the screen. A normally detected hard drive looks like the one in the image below.  If your hard drive doesn't say connected or reports 0 total space, there is most likely a problem with the hard drive.


5. To format the hard drive, click on the Format button in the bottom right of the screen.  This process will take anywhere from 1-5 minutes depending on hard drive size.

 **WARNING:  THIS WILL REMOVE ALL VIDEO OR DATA ON THE HARD DRIVE **


6. When the DVR finishes rebooting, your hard drive is formatted and ready for use.  


Simplified PoC NVR - How to Restore to Defaults

$
0
0

There are two ways to restore the PoC NVR to defaults.  

Option #1: Press and hold the reset button on the back of the NVR.  This will restore everything back to factory defaults.


Option #2: Use the Restore to Defaults option from within the menu.  


1. To do this, go to the Main Menu and select General Settings.


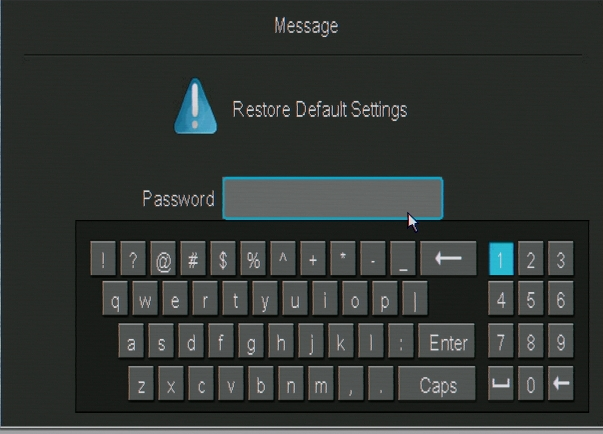
2. From the list on the left hand side, select the bottom option labeled Default.  The NVR will ask you if you are sure you want to restore the factory settings.  Click OK in the bottom right to restore the settings.  


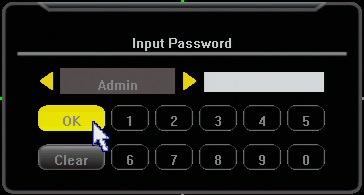
3. The NVR will then ask you to put in the admin password for the system.  Input your password and click Enter.  


4. The NVR will reboot when the restore to defaults is complete.


Default Admin Passwords for Zmodo DVR Units

$
0
0


The following is a comprehensive list of all default DVR passwords for current and previous Zmodo DVR models:

_________________________________________________________________________________

SBN Series (H9104V, H9108V, ZMD-DD-SBN4, ZMD-DD-SBN8, ZMD-DD-SBN6)

SAN Series (H9114V, H9118V, ZMD-DD-SAN4, ZMD-DD-SAN8)

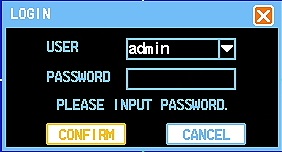
Login: Admin
Password: 111111 OR 888888
Click Here for more articles relating to this DVR.
________________________________________________________________________________

H8100 Series (H8104UV, H8108UV, H8106UV)

H8110 Series (H8114UV, H8118UV, H8116UV) 

Login: admin
Password: 666666
Click Here for more articles relating to this DVR.
_________________________________________________________________________________

ZMD-DT-SFN6

Login: admin
Password: (Blank)
Click Here for more articles relating to this DVR.
_________________________________________________________________________________


SCN Series(ZMD-DT-SCN4, ZMD-DT-SCN8)

SEN Series(ZMD-DH-SEN6)

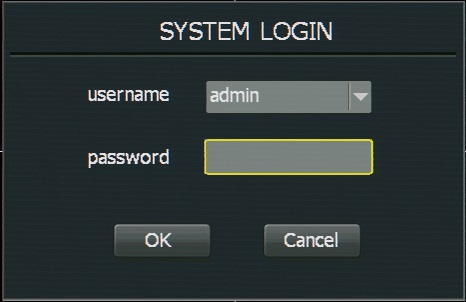
Login: admin
Password: (Blank) or 111111
Click Here for more articles relating to this DVR.
_________________________________________________________________________________

NVR Series: Basic NVR(ZMD-NV-SBN4), Mini-NVR(ZH-NA04-W), and POE-NVR(ZP-NC14-P)

Login: admin
Password: (Blank)
Click Here for more articles relating to the Basic NVR.
Click Here for more articles relating to the Mini-NVR.
Click here for more articles relating to the POE-NVR.
     _________________________________________________________________________________
 
 
If your DVR is not listed in this article, then your DVR does not prompt you for a password or have one by default. You will need to look up your DVR and follow the password reset guidelines if you do not know it.

What DVR Do I Have?

$
0
0

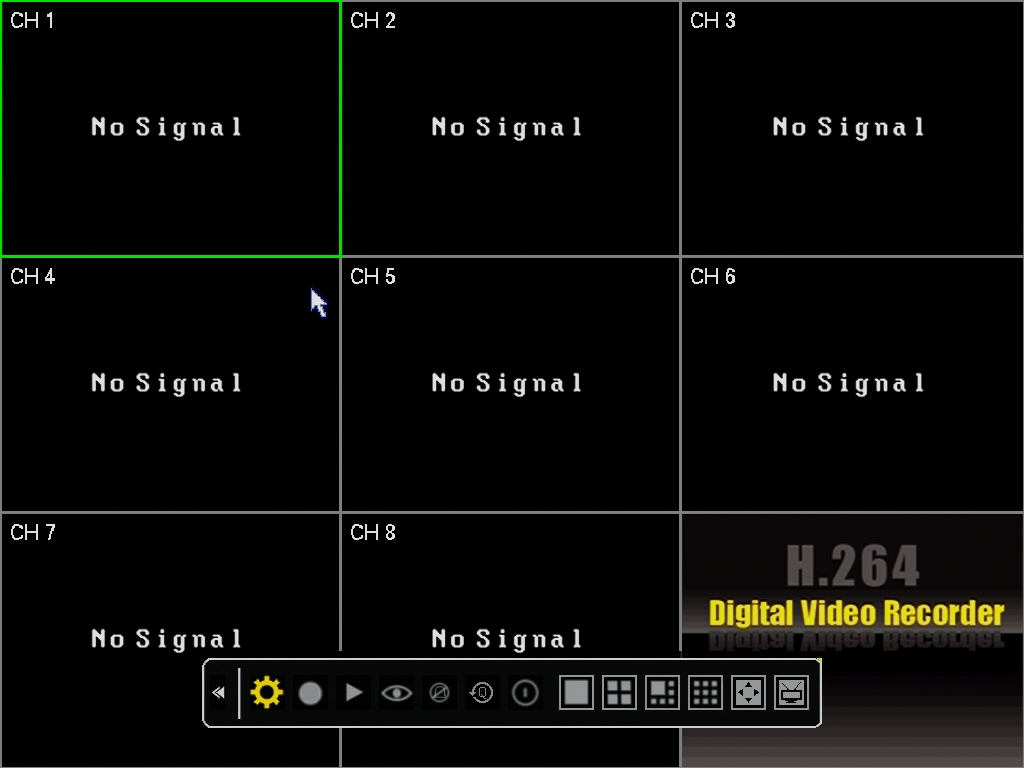
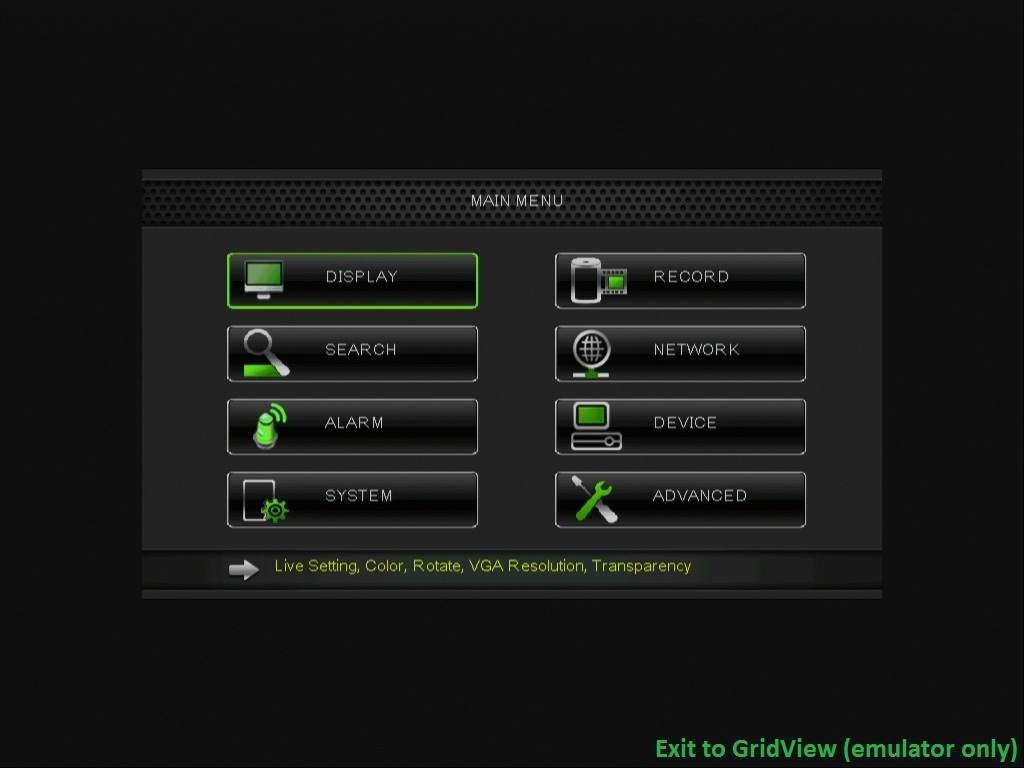
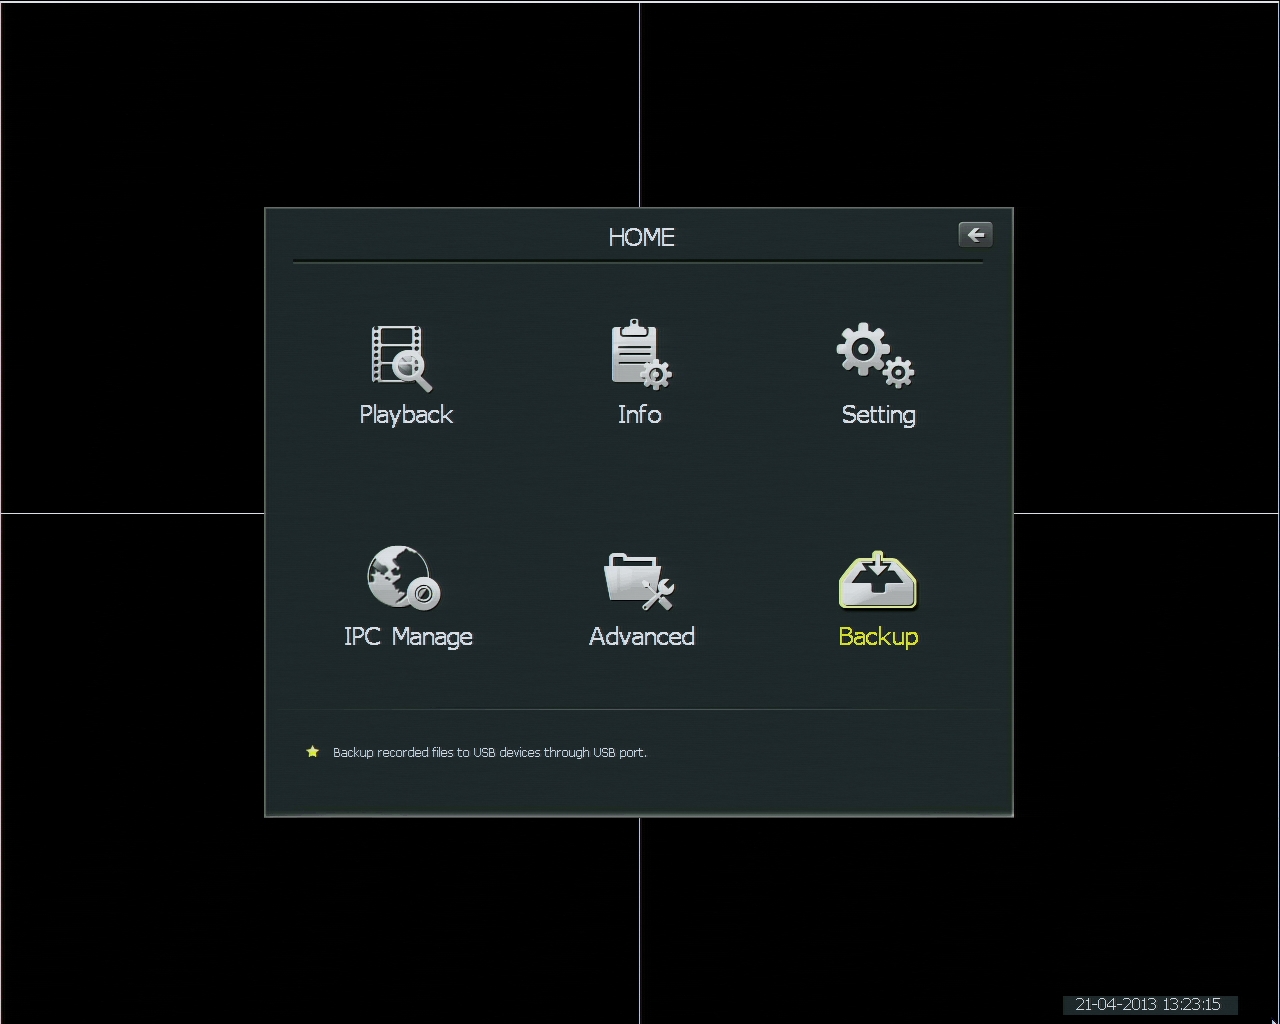
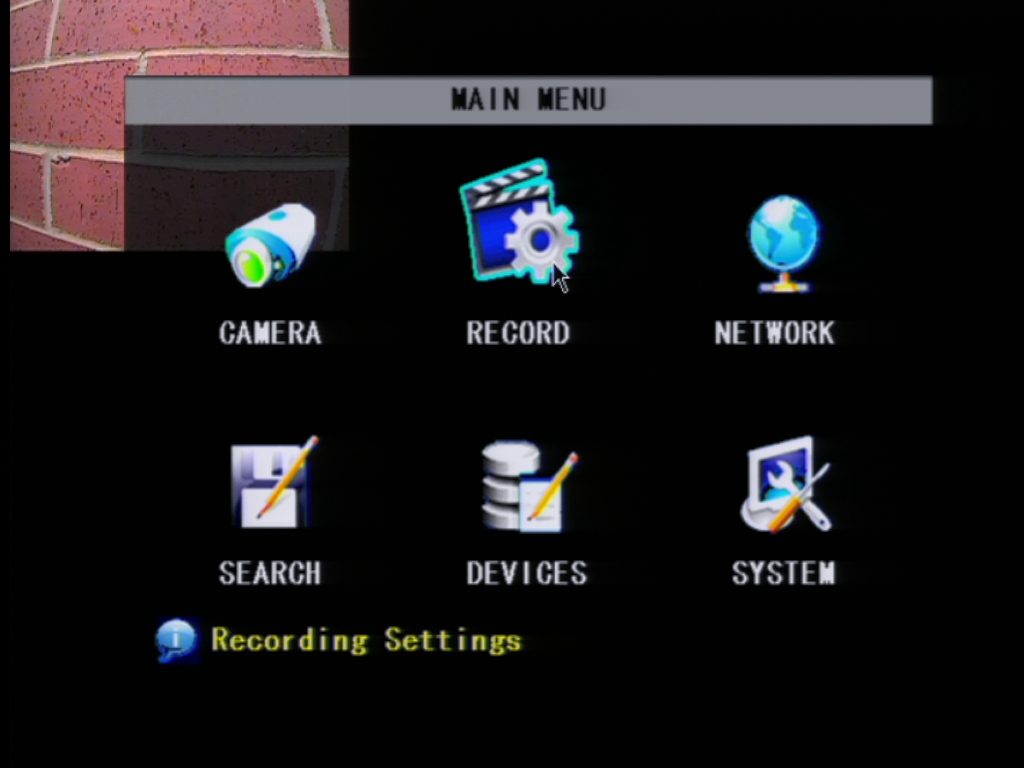
Using our knowledge base can be very difficult if you are unaware of what DVR you have. 


For articles relevant to your DVR, please click on the picture that looks most like yours below:


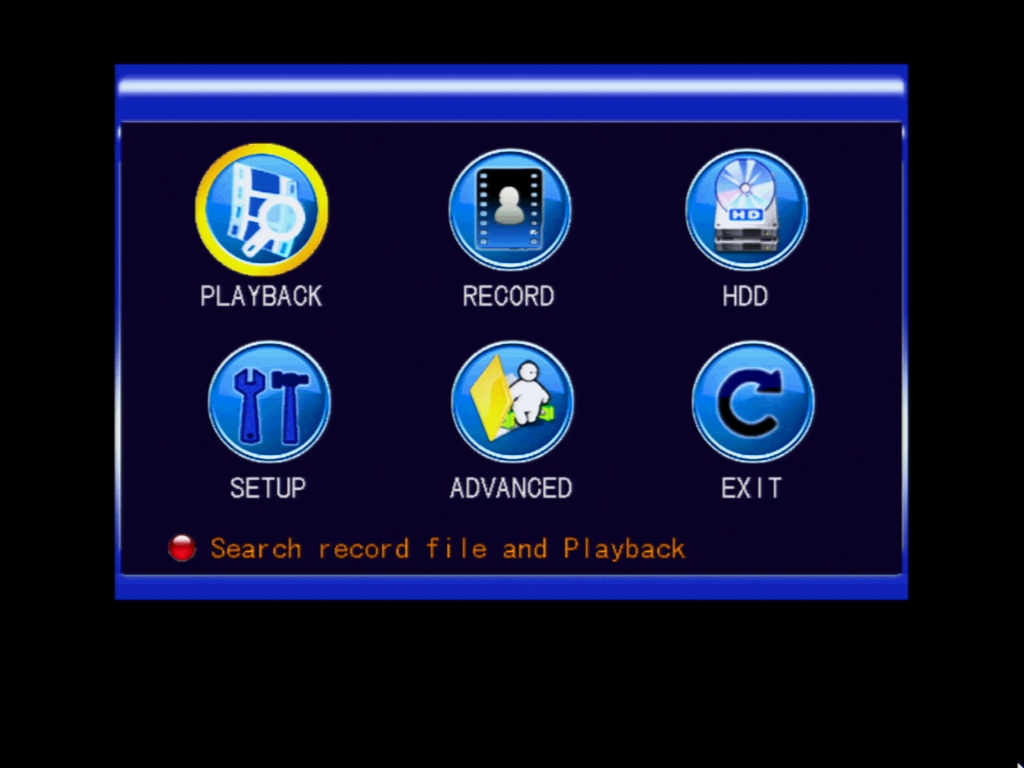
Main Menu SFN Series DVR       


Viewing all 208 articles
Browse latest View live


Latest Images