Quantcast
Channel: Zmodo Knowledge Base - Latest FAQs
Viewing all 208 articles
Browse latest View live

My cameras are in black and white all the time

$
0
0

IR Cut

If your cameras are in black and white all the time it could be because they are in a dimly lit environment, and so the night vision feature remains on all the time.

Some Zmodo cameras models will stay in color even in dimmer conditions.  If you must have the cameras in the dim environment, we suggest using a camera from the list below:


Not recommended for dim environments:

Better for dim environments :

ZMD-CBH-BUS23NM 

(Kit SKU: YARUZ4ZN)

ZMD-CCH-BBB23NM

(Kit SKU: CARQZ4ZN)

ZMD-CBR-BCS13NM

(Kit SKU: BARCZ4ZN)

ZMD-CBH-BUS23NM

(Kit SKU: YARUZ4ZN-N)

ZMD-CCH-BAS16NM

(Kit SKU: CARAZ4ZN)

ZMD-CCH-DBS23NM

(Kit SKU: CARZBZ4ZN)

ZMD-CCH-BCS13NM

(Kit SKU: CARCZ4ZN)


What DVR Do I Have?

$
0
0

Using our knowledge base can be difficult if you are unaware of what DVR you have.


For articles relevant to your DVR, click on the picture that looks most like yours below:


Main Menu SFN Series DVR       


What Kind of Hard Drive Will Work in a Zmodo DVR?

$
0
0
What Kind of Hard Drive Will Work in a Zmodo DVR?
 
In a Zmodo DVR, you can use almost any hard drive that uses the SATA interface.  You will want to follow the basic requirements when choosing which hard drive though.
 
Requirements: 
    1. SATA II or SATA III interface
    2. Storage capacity of at least 250GB and no more than 2TB.  See our Storage Calculator to determine exactly how much you need. 
    3. Choose a hard drive with a physical size of 3.5".  It may also be reffered to as a desktop sized hard drive.
 
There aren't too many actual requirements for a hard drive to work, however for the absolute best results, please follow our additional recommendations. 
 
Recommendations:
  1. Choose a hard drive that spins at 5400RPMS because these hard drives use less power and also produce less heat.
  2. Choose a hard drive that is rated as industrial/surveillance grade because a standard, PC grade hard drive will fail quickly in a DVR system.
  3. Use a hard drive with 16MB of cache or more.
  4. There are three hard drives that meet all of the requirements and recommendations and they are the Western Digital AV-GP line of hard drives and the Seagate Pipeline line of hard drives.  There is also a newer hard drive that Western Digital manufactures solely for DVRs.  This is the Western Digital Purple series.  
 
Warnings: 
    1. Stay away from using Western Digital Caviar Black hard drives.  They have higher power requirements and create much more heat. 
    2. Do not use a Solid State drive (SSD) in the DVR.  The constant writing of the drive will wear the drive out much faster than a traditional hard drive. 
    3. Do not use an external hard drive that hooks up through USB.  The USB interface does not allow live recording. 
 

Capture Image with Zviewer on iPhone

$
0
0

If you are pressing the camera button on the Zviewer app and it is not saving an image to your camera roll on your iPhone, then please follow these steps to enable this feature.


1. Go to the Settings menu in your iPhone.

iPhone Settings


2. Select Privacy.


3. Select Photos.


4. Then make sure the Zviewer applicatoin is set to ON.


5. You should now be able to press the camera capture button on the lower right, and it will save a screen shot for the image of the window that is selected with the red outline.


Troubleshooting Camera Connection to the Simplified POE NVR

$
0
0

In the event that the Simplified POE Cameras (SKU ZP-IBT15-S or ZP-IBH15-S) are not showing any video when connected to the Simplified POE NVR (SKU ZP-NE14-S) please complete the following steps:


1. Make sure that your router is securely connected to the NET port on the NVR (ZP-NE14-S) using an ethernet cable.  The NVR will be unable to locate the any cameras that are connected to it unless the NVR is also connected to a router.


2. Make sure all cameras are securely connected to the PORTS input on the back of the NVR using either ethernet cables or the simplified ethernet cables that came included with the Simplified POE kit.


3. If the cameras are still not appearing on the screen, press and hold the reset button on the back of the NVR for 30 seconds while the NVR is turned on.  This will set the camera input to default settings, and the NVR will automatically search for SPOE cameras that are connected to the back of the NVR.

DVR Shows in Chinese on My Computer

$
0
0

DVR is Showing in Chinese

(9118-4, SBN8-4-6, SAN8-4)

If you go to access a DVR on a computer, and it opens and shows in Chinese instead of English that may mean that the computer is missing the language pack needed.


To solve this, download the language pack from the following link:

 http://files.zmodo.com/Software%20Files/CCLangEn4204.dll

Once downloaded, move the CCLangEn4204.dll  file from your downloads folder into the folder for your DVR's web client. This folder is located at C:\Program Files\ClientControl\sDVR


After moving the file, you will want to close Internet Explorer completely, including all windows open on your computer. Once all windows are closed closed, reopen Internet Explorer and navigate to your DVR. The issue should be resolved, and the DVR should show in English.


How to connect the SNC4, SCN8, and SEN6 to the General CMS software

$
0
0


This is a tutorial on how to connect DVRs with the SKU numbers SCN4, SCN8 and SEN6 to the General CMS software that came with the DVR units.  If you have misplaced the disc, click here to download the software.

1. When you first open the software, there will be a warning that there is no device connected.


Click OK and then select the option for System as shown below.


2. Select the option for Device Manager.


3. This should open up a new window. Select Add Area.


4. For the Zone enter a description of the location of the DVR, for example Home or Work. Then click OK. This is to help organize your DVRs if you have multiple DVRs in different locations.


5.The zone you created will apear in the Zone List.  Select the zone that you created, and then the option to Add Device will appear.


6. Before adding the new device, the DVR should already be setup for local or remote access.  You will also need all the IP addresses, port numbers, and login information already setup on your DVR.

  • Name: this can be whatever you like it to be
  • IP Address: 
    • If you are on the same local network, you will use your local IP address that should be listed in the Network section on the DVR (Usually 192.168.x.x or 10.0.x.x)
    • If you are away from the location, you will use your External or Public IP address.
  • Port: By default it should be 34567, unless it has been changed on DVR's network settings
  • Username/Password: This will be the username and password you use to access the DVR.
    • It may be the administrator username and password for full privileges.  
    • It can aslo be a custom username and password that was created for specific users with limited access.


Once you have all that information filled out.  Click OK and you should see your Device Name that you created listed underneath the Zone.  Click OK again to go back to main screen. 

7. You can now double-click on the Device Name listed under the Device List.  You should see on the bottom that it says Connect Successful, and your camera channels will appear under the DVR Device Name.


 8. To connect to the cameras, right-click on the Device Name and select the option for Connect all Video.  

  • Choose the Main Stream if you are local or want higher quality video, but this may take longer to load.  
  • The Extra Stream will give you a smoother image with a lower quality image.

 You can also open each channel individually by first selecting a window with the green outline.  Then double-click on one of the channels, for example CAM01, and the channel will appear in that window.  Repeat the process for the other channels.


What size camera lens do I need?

$
0
0

Use our  Field of View calcuator to see what lens size will work best for the environment you want to monitor. 

Calculate Field of View


To help visualize how lens size will affect the field of view, click the picture below for our field of view demo. 


How long will the DVR's hard drive record before overwriting?

$
0
0

There are several factors that will affect how long video is saved on the hard drive before it is overwritten. It will depend on how many cameras are recording, the frames per second they are recording, and the recording schedule.

Click the picture below to use our DVR storage calcualator to see what size hard drive you need. 


How does the Intelligent Recording Work?

$
0
0

The new Zmodo Simplified Power Over Ethernet NVR with firmware version V40.0.1.9 or newer has only two recording options: Basic Recording and Intelligent Recording.

If you pick Basic Recording, the NVR will record 24 hours a day, seven days a week on all channels at the highest possible framerate.  If you pick Intelligent Recording, the DVR will record at the full 30FPS when the NVR detects motion, but when there is no motion the NVR will only record one frame every 5 seconds.  This is a really good way to make sure you're covering all necessary recordings while maximizing HDD space.

How to Fix Image Distortion on ZMD-DT-SFN6

$
0
0

The DT-SFN6 DVR units with a 2013 hardware and software build will sometimes display various kinds of screen distortion on camera channels.  This distortion can appear as screen bending, dark wavy lines, or image shaking.  The distortion most often appears toward the top of the screen.


The following image shows a few examples of the image distortion:


The DVR requires a software update to the March 2014 software buid in order to fix this issue.  Please complete the following steps in order to upload the correct software to the DT-SFN6:


1. Download the following attachment:  "FWHI3116TW_20140320_DVR_R8116B_1_8_3_7969B13-zmodo.rom"

2. Save the software update to a USB flash drive. Make sure the software is not inside of a folder in the USB flash drive.  Insert the USB flash drive into one of the USB input ports on the DVR.

3. On the DVR menu, go to Setup > System Tools > System Maintenance.

4. From the System Maintenance menu, click "Start" next to System Upgrade.

5. Aftwer the software file becomes saved to the DVR, click "OK" to restart the DVR.  The DVR will prompt you to restart during the software update process, do not manually restart the DVR.

6. After the software update is complete, the DVR will revert back to factory settings and the image distortion will be fixed.


How to Weatherproof Cable Connections

$
0
0

When installing cameras outdoors, it is always necessary to weatherproof the ends of the cables where the camera connects to the cable.

It is a good idea to weatherproof the entire length of cable that is outdoors to fully extend the lifetime of the cable, but the cable ends are especially not weatherproof.


To weatherproof the cable ends, you can either tape the cable ends or install the cable ends into a conduit box.  By far the safest option is to install the cable ends into a conduit box to protect the cable ends from the rain and wind.

A simple search for "conduit box" on Amazon.com will lead to many different options at different price ranges.  This item is also readily available at hardware stores such as Lowes or Menards.

If you do decide to tape the cable ends isntead of installing them in a conduit box, it is highly recommended to wrap plastic around the cable end first and then tape the plastic to the cable.  This makes it easy to remove the tape and plastic in the event that you need to unplug the cable in the future.


Zsight Update Published May 27, 2014

$
0
0

This new update has several major changes.

1. Zsight now requires the user to create an account and login.  Each device ID can only by assigned to one user account.


2. You will also need to rescan the QR code on your camera to add it to the app. You must now be at the location of the camera to add the device to your Zsight application.


Tap the [+] icon in the upper right-hand corner.

Tap Scan QR Code from the list that appears. (The EZ Link is for furtue products.)


Scan the QR code on your camera or NVR. 


Important: If you update the application, you will need to re-add your cameras. You must be at the location of the camera to re-add it.


Also, the new app has a remote control feature that you can use when your phone is on the same Wi-Fi as the NVR.


How to Backup and Convert Video Files for a DR-SFN6, H9124, or H9128

$
0
0


1. Enter the “Video Search” screen from SUB MENU →VIDEO SEARCH or MAIN MENU→PLAYBACK as shown below:


2. Enter date to be searched in the date box or select the day from the calendar box. Then click SEARCH to load recorded videos in the calendar.


A green block indicates normal recording, a red block indicates alarm recording, and the background color indicates no recordings are on that day.


In this example Jun. 12 is selected and a normal recording is found for 10:30 pm.


3. Click “File List” button to enter the backup menu box.


4. In the “Detailed File List” screen select a recorded file. A check mark will appear in this box, indicating that this record file has been selected.

5. Insert a USB storage device and click BACKUP. A pop-up notification will show the progress of the file backup.

6. To view your files using a standard media player, you will need to convert the file you backed up to a USB drive from the h.264 format to .avi format. For the conversion, you will need to download a program called NetDVR onto your computer.


http://files.zmodo.com/Software%20Files/PC%20Viewing%20Software/DVRs/NetDvr.msi


7. You will need to run NetDvr and click Offline


8. Click on the H.264 to AVI button


9.Browse to your source file

10. Select your Destination file path

11. Click h264toavi button in the box which shows your SrcFile and DestFile.


What to Do When Your Order is Missing Items

$
0
0

We appreciate when you choose Zmodo as your security equipment provider, and we strive to make sure that every item is packaged correctly and with care.  In the event that your order arrives and it is either missing items or includes the wrong items, please take the following steps so that we can remedy the problem:


First, please make sure to check all packaging for the items that appear to be missing or incorrect.  Some of the packaging that is used by Zmodo may hide the cameras or accessories.  Please see the image below as an example:

The packaging used for the Simplified POE kit hides the cameras if the box is opened upside down, so please check all packaging for the missing or incorrect items.


If you confirm that your order is definitely incorrect or missing items, please email the following information to support@zmodo.com:

     A copy of your invoice.

     Pictures of the all packaging including the dimensions of the box that all items were received in.

     Pictures of all product serial numbers on the equipment packaging.

     If your DVR was supposed to include a Hard Drive and there was no Hard Drive included, please send an image of the bottom of the DVR.


You also have the option to contact Zmodo Customer Support Live Chat, however in most cases the Customer Support agent is required to gather your invoice and pictures of packaging & serial numbers in order to process a missing or wrong items claim.


How to Backup Video and Convert to AVI using the Old H9104V, Old H9108V, or H9116UVDH

$
0
0

How to Convert Video from H.264 format to AVI format

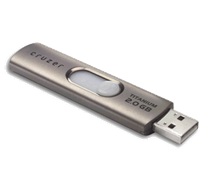
1.First thing that you will need is a usb flash drive to backup your files from the DVR.


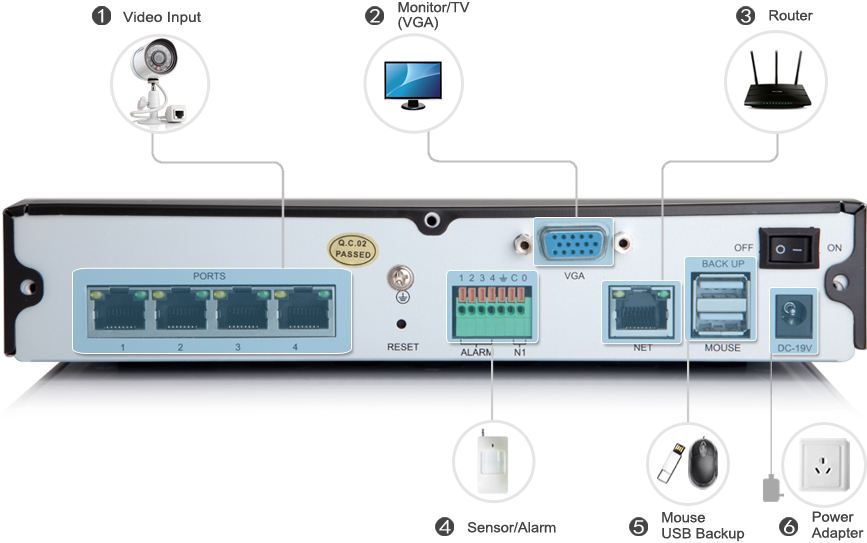
2. Insert the usb flash drive into the usb port on the front panel or on the USB ports on the back of your DVR.

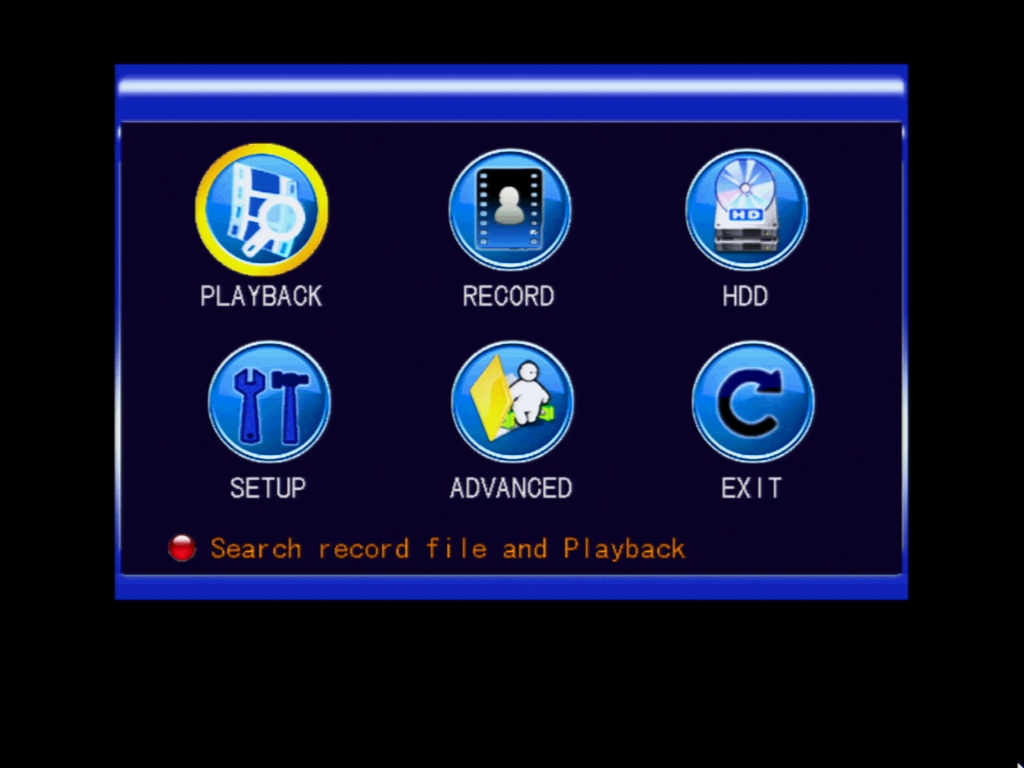
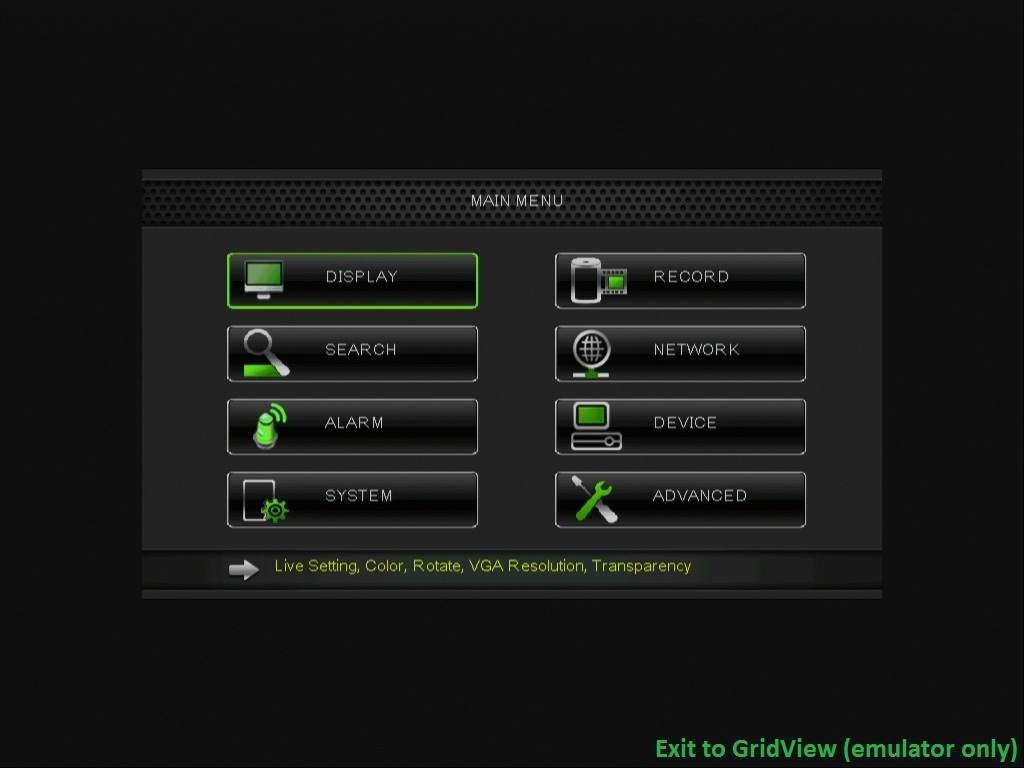
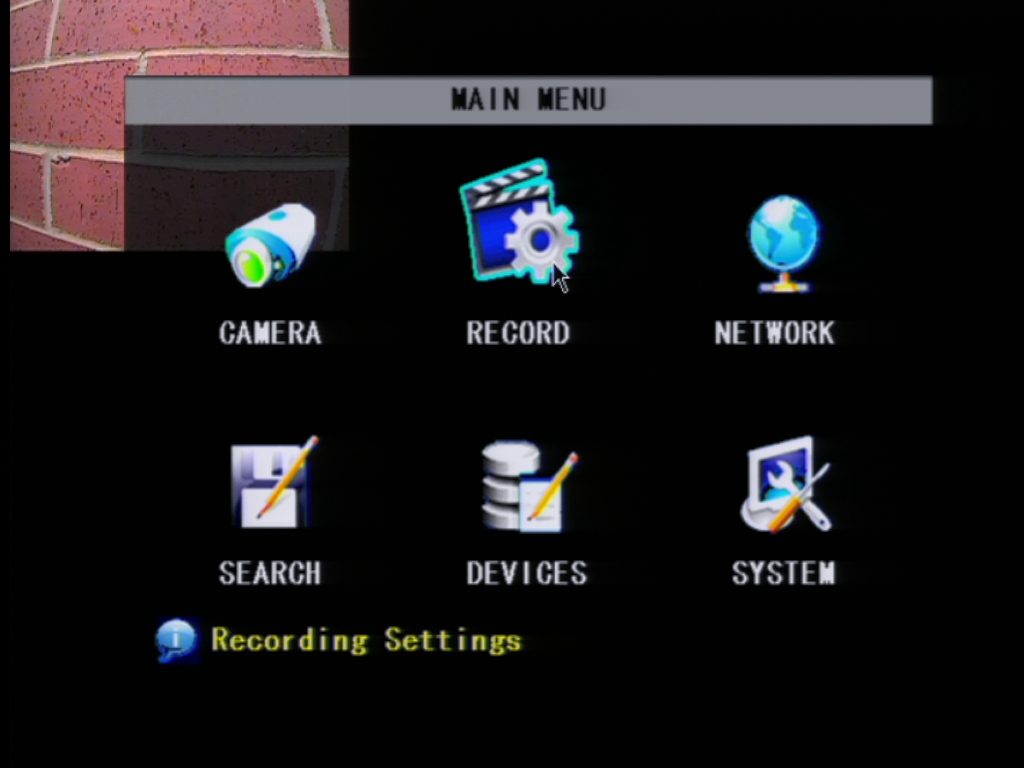
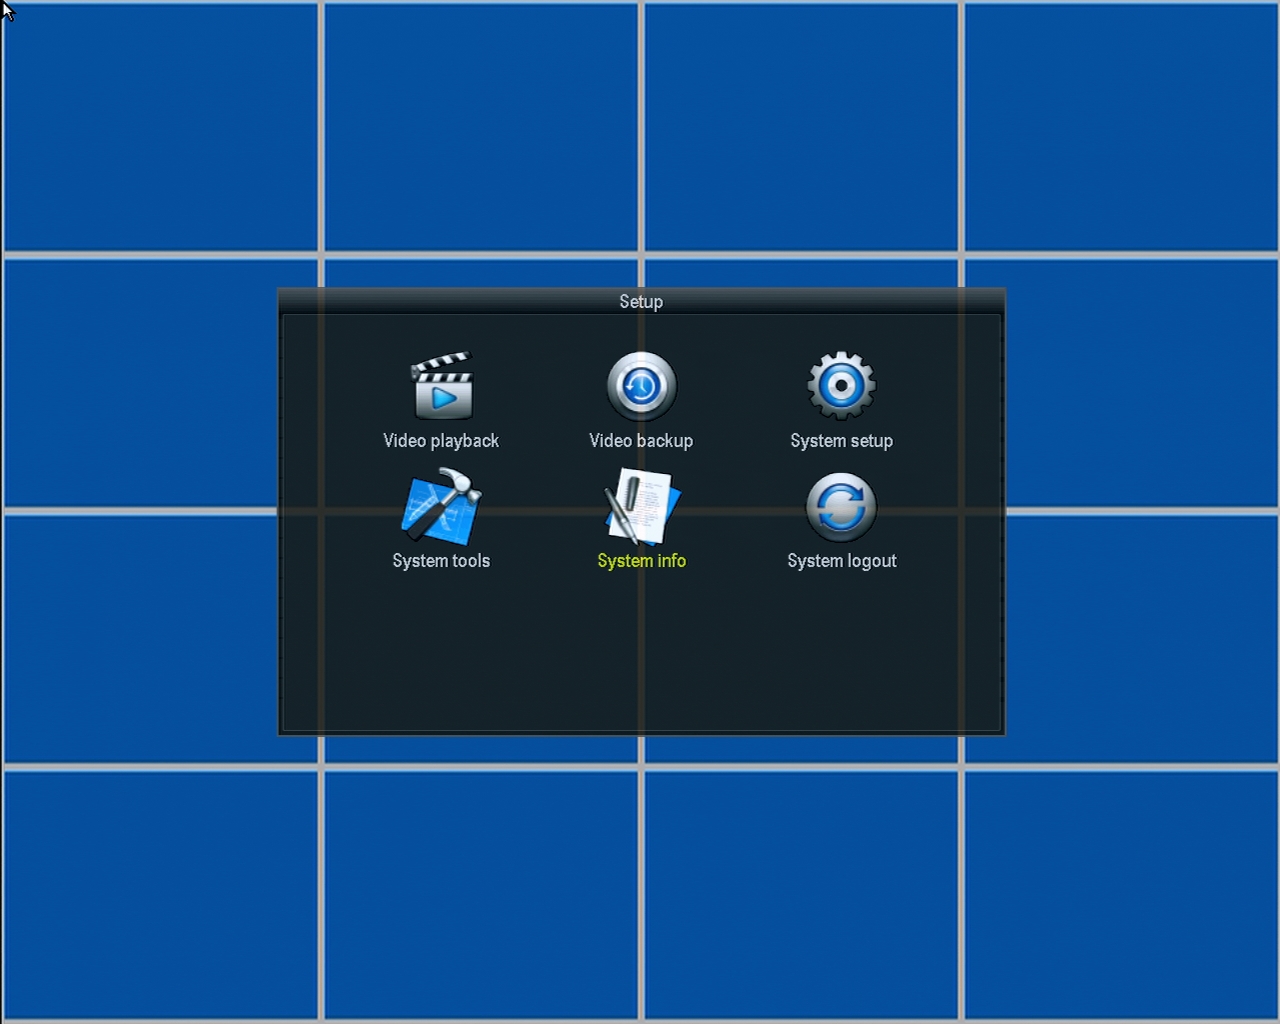
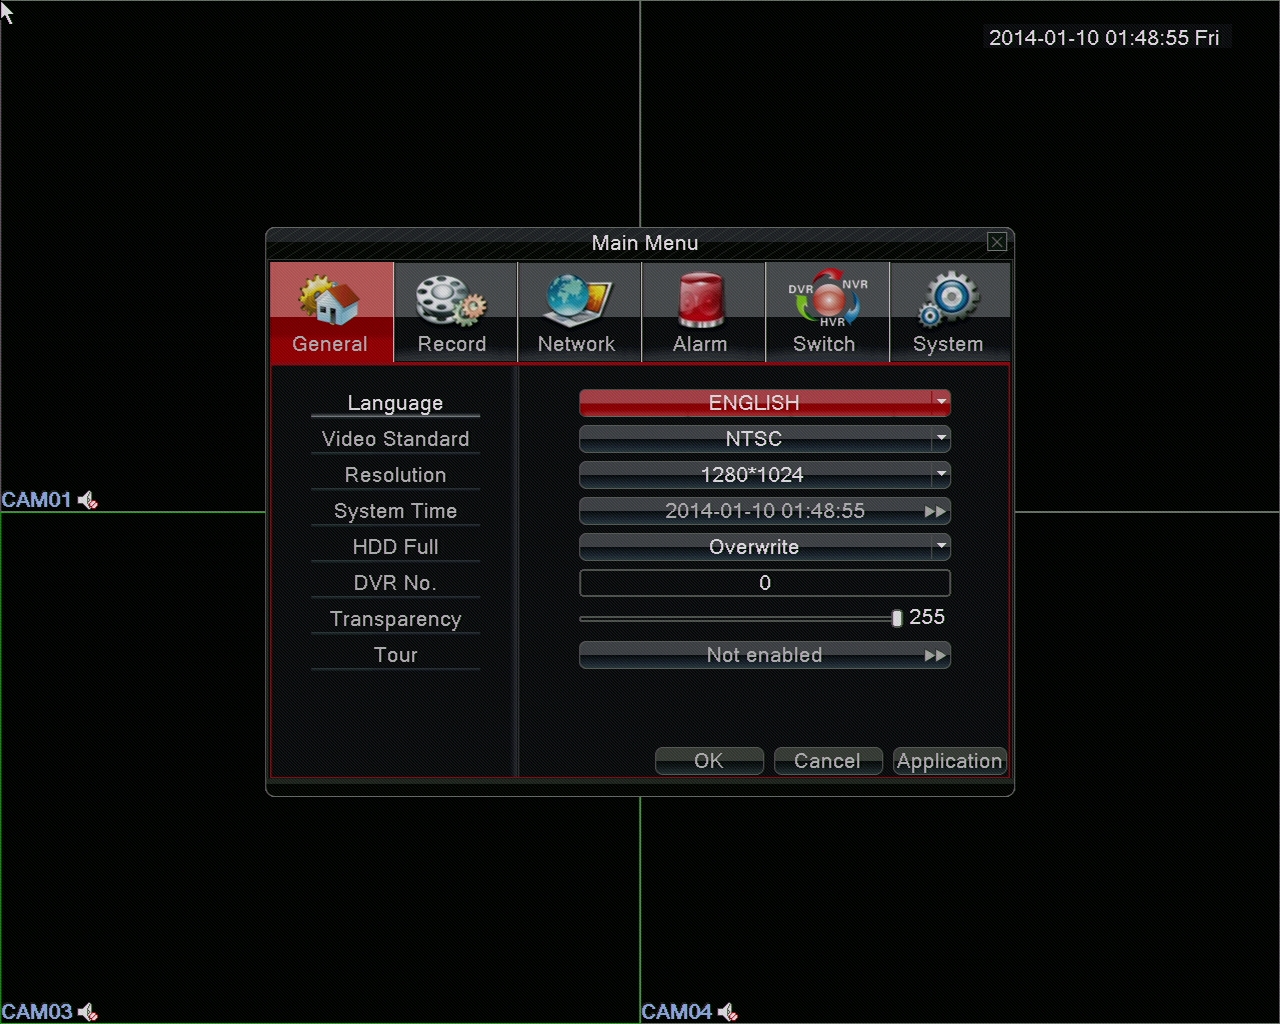
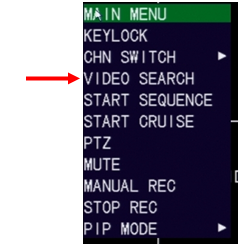
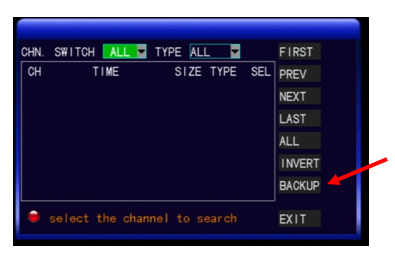
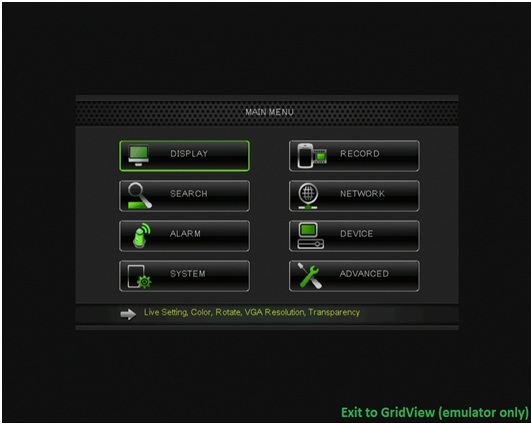
3. Next with your mouse connected to your DVR access the main menu of your DVR. Your main menu should look like the image below if the sku# of your DVR has the DVR-H9104V, DVR-H9108V, or the DVR-H9116uvdh if you are viewing your system on a computer monitor or television. Select the Search Sub-Menu from your options on the main menu.


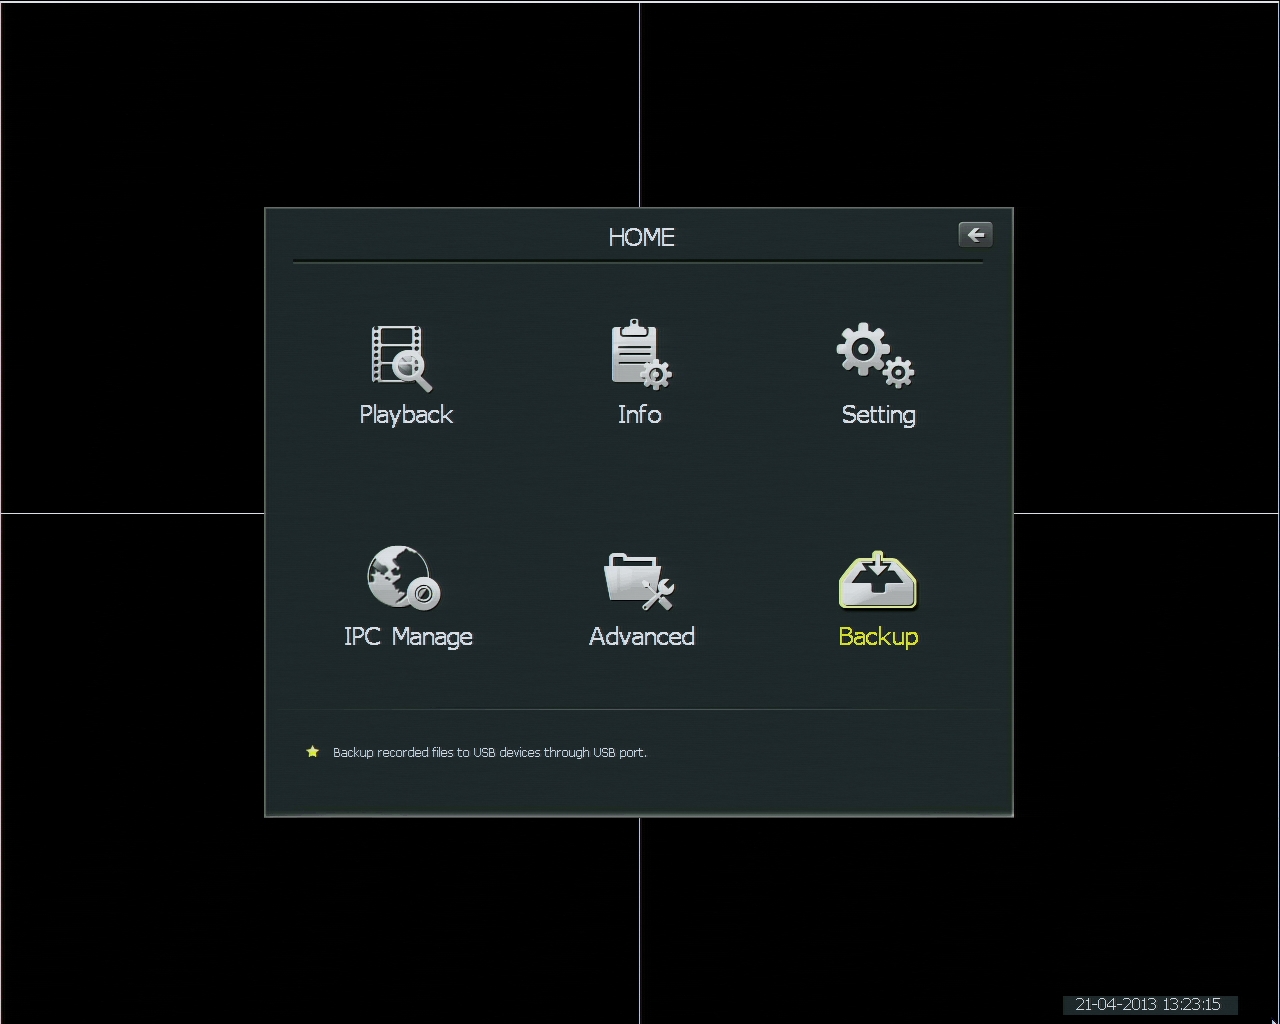
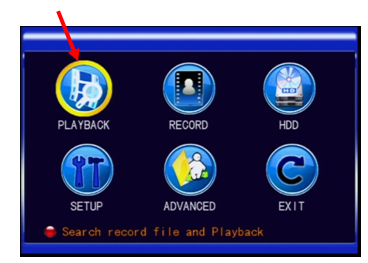
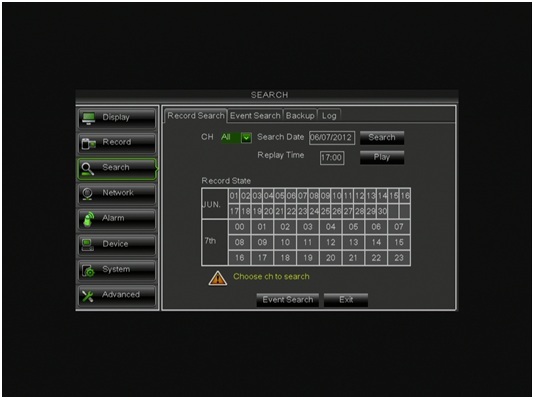
4. In search, select the Backup Tab on 9104v,9108v. Select the Event Search Tab on the 9116uvdh

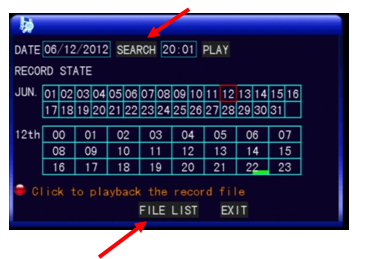
5. Enter the desired date and time or time range that you would like to backup to your usb flash drive and select the search button on the bottom of your menu.

Take note of a few things at this point

a. The start and end time of the recordings. This is the time of the day that the recording occurs. If you have already done a playback and know what time you want go ahead and backup your file. If you file isn’t on the first page of files select the arrows to go forward, or backward to find your particular file.

b. The channel setting. This allows you to select files to backup from multiple channels on your DVR or from a specific channel of your DVR.

c. the BAK option should have a box where you can place a checkmark for your selected files that you would like to backup. Once you have selected your files select Backup on the bottom of your screen. Your files should now be backing up one by one to your flash drive or external hard drive.


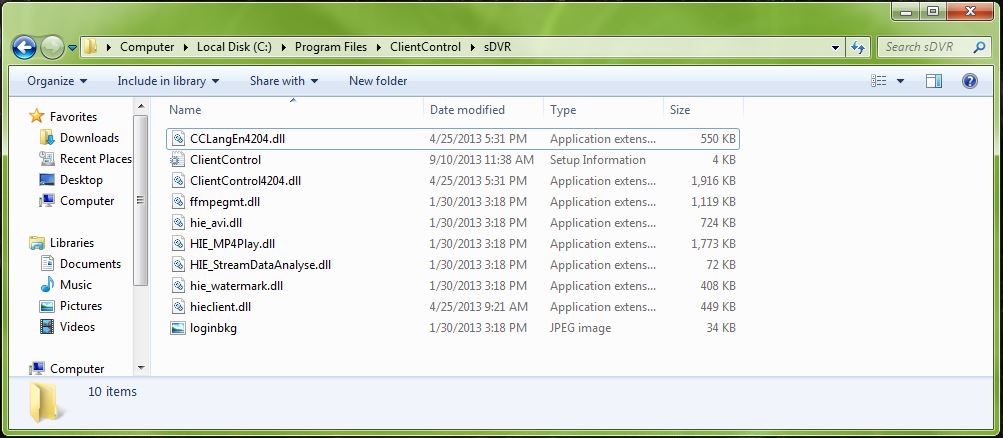
6.With your files saved on your flash drive you can insert the flash drive into your computer and download the software disc for your DVR. You may download that disc HERE.


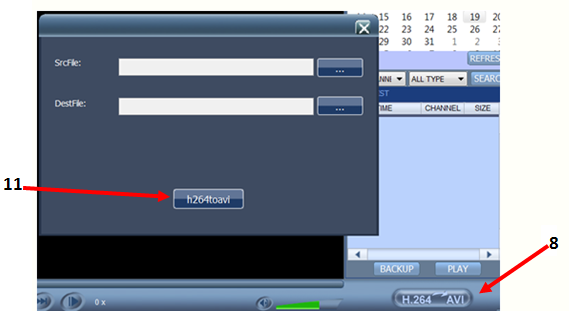
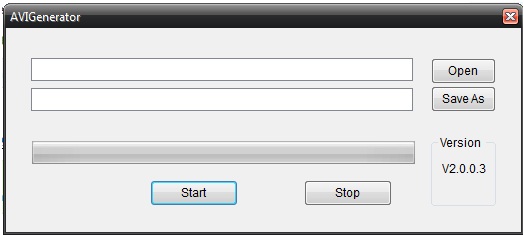
7.Save or Open the file download and install to the desired location on your computer but you want to make sure that you select AVI Generator 2.0.0.3. Once you open the program you should have this file converter layout below.

8.Select Open to access your H.264 file and then select "Save As” to save your file as a .AVI file.

Then select the Start button to complete the conversion.


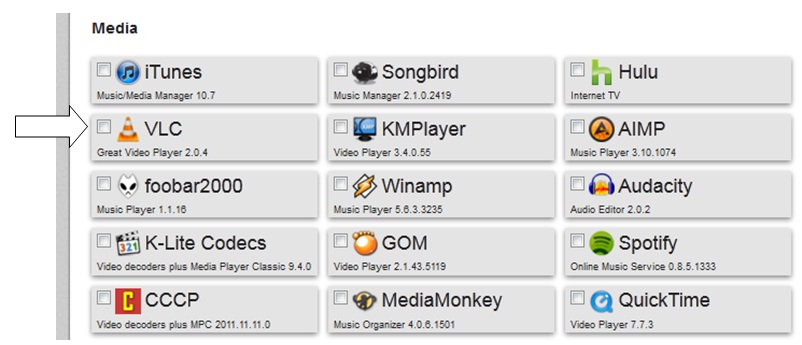
9.Once the conversion is complete you will have an AVI file that you can play either in Windows Media Player or VLC Media Player. We recommend that VLC Media Player is used. You can obtain a free download of VLC Media Player using the link below.

www.ninite.com On that website you would scroll down about 1/3 of the page down and find VLC Media Player.

10.Once this file is downloaded and installed on your computer you should be able to play your .AVI file(s).

Email setup for dvrs

$
0
0


Email Alert Settings

Gmail Email Alert Settings

**Before using your Gmail account as your SMTP server, be sure that you have enabled Gmail POP3 or Gmail IMAP through settings in your Gmail Account.**

SSL : Enable

SMTP Server : smtp.gmail.com

SMTP Port : 465 or 587

Sender : "your gmail email address" (ex. johndoe@gmail.com)

Password : "your gmail password"

Reciever : "your email address" (ex. johndoe@gmail.com)


Yahoo Email Alert Settings

**Before using your Yahoo! Mail account as your SMTP server, be sure that you have enabled Web&POP Access in your Yahoo! Mail Account(go to Options>Pop&Forwarding)**

SSL : Enable

SMTP Server : smtp.mail.yahoo.com

SMTP Port : 465 or 587

Sender : "your yahoo email address" (ex. johndoe@yahoo.com)

Password : "your yahoo password"

Reciever : "your email address" (ex. johndoe@yahoo.com)


Outlook.com (formerly Hotmail or MSN) Email Alert Settings

SSL : Enable

SMTP Server : smtp-mail.outlook.com

SMTP Port : 587

Sender : "your email address" (ex. johndoe@hotmail.com or

johndoe@live.com )

Password : "your password"

Reciever : "your email address" (ex. johndoe@hotmail.com or johndoe@live.com)


AOL Email Alert Settings

SSL : Enable

SMTP Server : smtp.aol.com

SMTP Port : 587

Sender : "your aol email address" (ex. johndoe@aol.com)

Password : "your aol password"

Reciever : "your email address" (ex. johndoe@aol.com)

Email Alert Settings

$
0
0


Email Alert Settings

Gmail Email Alert Settings

**Before using your Gmail account as your SMTP server, be sure that you have enabled Gmail POP3 or Gmail IMAP through settings in your Gmail Account.**

SSL : Enable

SMTP Server : smtp.gmail.com

SMTP Port : 465 or 587

Sender : "your gmail email address" (ex. johndoe@gmail.com)

Password : "your gmail password"

Reciever : "your email address" (ex. johndoe@gmail.com)


Yahoo Email Alert Settings

**Before using your Yahoo! Mail account as your SMTP server, be sure that you have enabled Web&POP Access in your Yahoo! Mail Account(go to Options>Pop&Forwarding)**

SSL : Enable

SMTP Server : smtp.mail.yahoo.com

SMTP Port : 465 or 587

Sender : "your yahoo email address" (ex. johndoe@yahoo.com)

Password : "your yahoo password"

Reciever : "your email address" (ex. johndoe@yahoo.com)


Outlook.com (formerly hotmail or MSN) Email Alert Settings

SSL : Enable

SMTP Server : smtp-mail.outlook.com

SMTP Port : 587

Sender : "your email address" (ex. johndoe@hotmail.com or

johndoe@live.com )

Password : "your password"

Reciever : "your email address" (ex. johndoe@hotmail.com or johndoe@live.com)


AOL Email Alert Settings

SSL : Enable

SMTP Server : smtp.aol.com

SMTP Port : 587

Sender : "your aol email address" (ex. johndoe@aol.com)

Password : "your aol password"

Reciever : "your email address" (ex. johndoe@aol.com)

What Kind of Hard Drive Will Work in a Zmodo DVR?

$
0
0
What Kind of Hard Drive Will Work in a Zmodo DVR?
 
In a Zmodo DVR, you can use almost any hard drive that uses the SATA interface.  You will want to follow the basic requirements when choosing which hard drive though.
 
Requirements: 
    1. SATA II or SATA III interface
    2. Storage capacity of at least 250GB and no more than 2TB.  See our Storage Calculator to determine exactly how much you need. 
    3. Choose a hard drive with a physical size of 3.5".  It may also be reffered to as a desktop sized hard drive.
 
Recommendations:
  1. Choose a hard drive that spins at 5400RPMS because these hard drives use less power and also produce less heat.
  2. Choose a hard drive that is rated as industrial/surveillance grade because a standard, PC grade hard drive will fail quickly in a DVR system.
  3. Use a hard drive with 16MB of cache or more.
  4. There are three hard drives that meet all of the requirements and recommendations and they are the Western Digital AV-GP line of hard drives and the Seagate Pipeline line of hard drives.  There is also a newer hard drive that Western Digital manufactures solely for DVRs.  This is the Western Digital Purple series.  
 
Warnings: 
    1. Stay away from using Western Digital Caviar Black hard drives.  They have higher power requirements and create much more heat. 
    2. Do not use a Solid State drive (SSD) in the DVR.  The constant writing of the drive will wear the drive out much faster than a traditional hard drive. 
    3. Do not use an external hard drive that hooks up through USB.  The USB interface does not allow live recording. 
 

InstallCard

$
0
0
 
Zmodo systems come with and InstallCard that offers the option for you to hire a third-party installation company install the security cameras for you.
 
The card will instruct you to go to www.zmodo.installcard.com and enter the card number. 

Once you enter the number, you will be asked some of questions regarding where you live, which system you purchased, where you want the DVR, how youwould like to view it, where each camera will be mounted, and if you need the wires concealed.

After you complete the questionnaire you will be informed that the card is now active and that pricing is not yet available online, and you will receive an email. A InstallerNet representative will call you within 2 business days with a quote and to scheudle an installation time. 

You can also contact support@installernet.com with any questions or issues about this service.


Viewing all 208 articles
Browse latest View live