Once you have completed the
Local Network Setup, you should have an internal IP address for your DVR.
The next step in the process is to forward ports pertaining to the DVR, so that you can see your cameras remotely. We recommend that you follow the steps in our network tutorial located at
zmodo.com/network. This video walks through using our network tutorial:
Forward DVR's Ports
1) Log in to your router by entering the gateway IP, such as 192.168.1.1, in to your browser window. Enter the login information for your router. If you cannot remember this, you can check the default username/password combinations for most routers at
http://www.pcwintech.com/default-router-modem-passwords. If you are unable to locate this information, please contact your router manufacturer or Internet Service Provider.
2) Once you've logged in to your router, you will need to enter the Port Forwarding section of your router. There, you'll enter the IP address, protocols, and port numbers for your DVR.
IP Address = IP address in your DVR's Network Settings
Protocol = BOTH (TCP/UDP) OR TCP
Service or Application Name can be anything you wish, like DVR1 or DVR2
Create 1 rule per port number; Start and End Ports will be the same number
Here are the default ports for Zmodo units (last port # is the mobile port):
H9104, H9108, H9106, H9116: 80, 9000, 18004
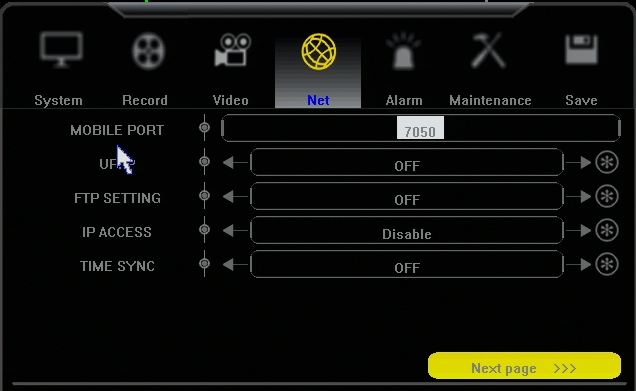
H9114, H9118: 80, 5050, 6050, 7050
H9124, H9128, DR-SFN6: 80, 9000, 15961
H8000/H8100 series: 80, 7777, 8888
Note: If you are using a DSL internet service, you may need to use port 81 (instead of 80) as your web port. If so, be sure to change this in your DVR's network settings, and restart the unit. Once the port number is changed, you will need to use it when connecting to the unit (ie.
http://192.168.1.1 becomes
http://192.168.1.140:81)
3)Below are screenshot samples of common router's Port Forwarding sections. Please note that exact locations may differ depending on your router's model. If your model is not listed, try looking through Advanced, Firewall, or Forwarding sections in your router to find the exact location.
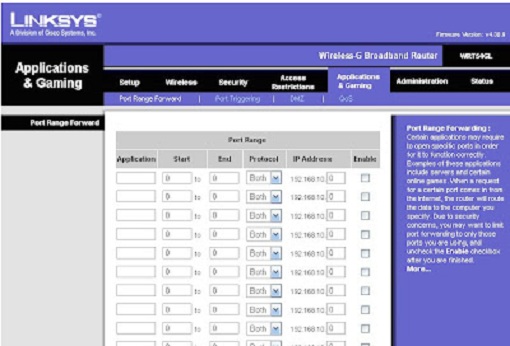
Linksys
In Linksys routers, you will typically enter Applications & Gaming, then Port Range Forward. Exact names/places will differ depending on model. Be sure to create forward 1 port range per line, and check the 'Enable' box at the end of the line, then save changes.
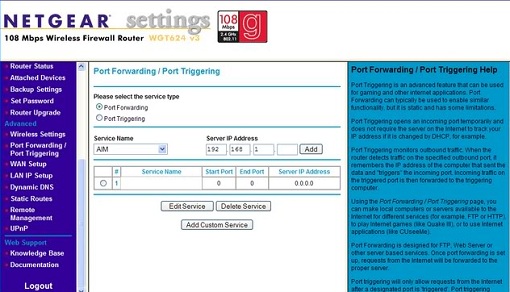
Netgear
In Netgear routers, you will typically look under Advanced for Port Forwarding/Triggering. Select Port Forwarding as your service type. Then, select 'Add Custom Service' for each port you forward.
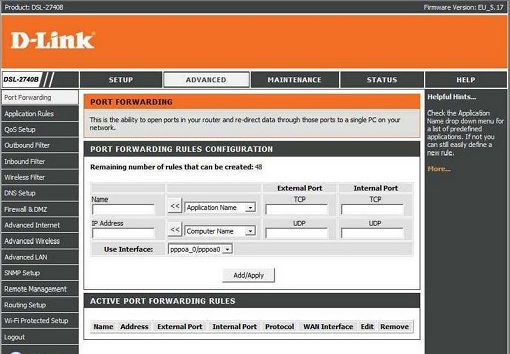
D-Link
For D-Link Routers, you will enter Advanced, then Port Forwarding. Click 'Add/Apply' when you have finished each rule.
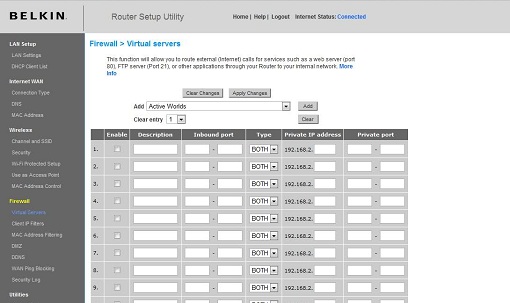
Belkin
For Belkin routers, access port fowarding under Firewall, Virtual Servers. Be sure to check the 'Enable' box, then hit the 'Set' button, and save your changes.
2-Wire
For 2-Wire modems, enter Firewall, then Advanced Settings.
First, look for the DVR's IP address under (1) Select a computer. If you do not see the DVR's IP address here, you may need to go in to the DVR's Network Settings, and set the DVR to DHCP (instead of Static), then reboot the DVR. Once the unit reboots, check it's IP address in the Network Settings, then go back to your router to select the DVR from the list.
Next, you will need to click on "Add a new user-defined application", to come to the this new screen:
Create your rule, and click 'Add Definition'. Create a rule for each port. Then, click Back.
When done, select each application you have created, and click 'Add', so that you see the desired applications in the Hosted Applications table. When finished, click 'Done' at the bottom of the screen.
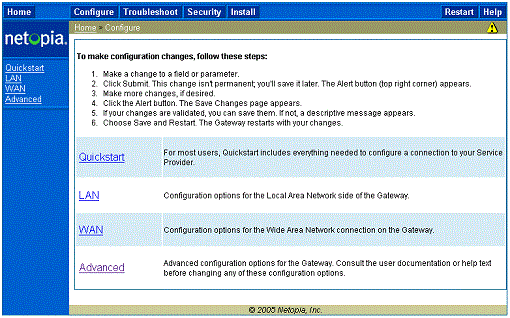
Netopia
For Netopia routers, click on the Configure tab at the top of the page.
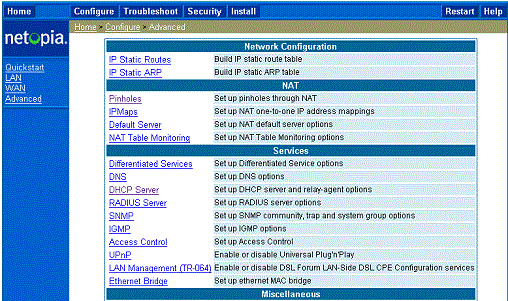
Next, click on Advanced.
From the Advanced menu, click on Pinholes.
Create your rule, then hit 'Submit', and repeat for each port. When you have completed, click on the yellow triangle with an '!' inside (located at the top righthand corner) to save your changes.
Checking Your Connection
Here, you will see fields for Remote Address and Port Number.
To check that your ports are open, enter each port you've forwarded (one at a time) in to the Port Number field, and click 'Check'.
If you see a green flag, and a statement "Port X is open on XXX.XXX.XXX.XXX", you have fowarded your ports correctly. You are now able to view your DVR remotely.
If you see a red flag, the port is not open. Go back in to your router, and double check at all information is correct. In some cases, a port may be blocked by your ISP. To find out why, or to request it opened, please contact your ISP.
Important: The Remote Address that you see is your DVR's external IP address. This is the address that you will use to access your DVR from a different computer. Write this down!! And remember, ActiveX settings must be changed on each new computer that you are viewing from before you'll be able to bring your DVR up.
 , which brings the following pop up